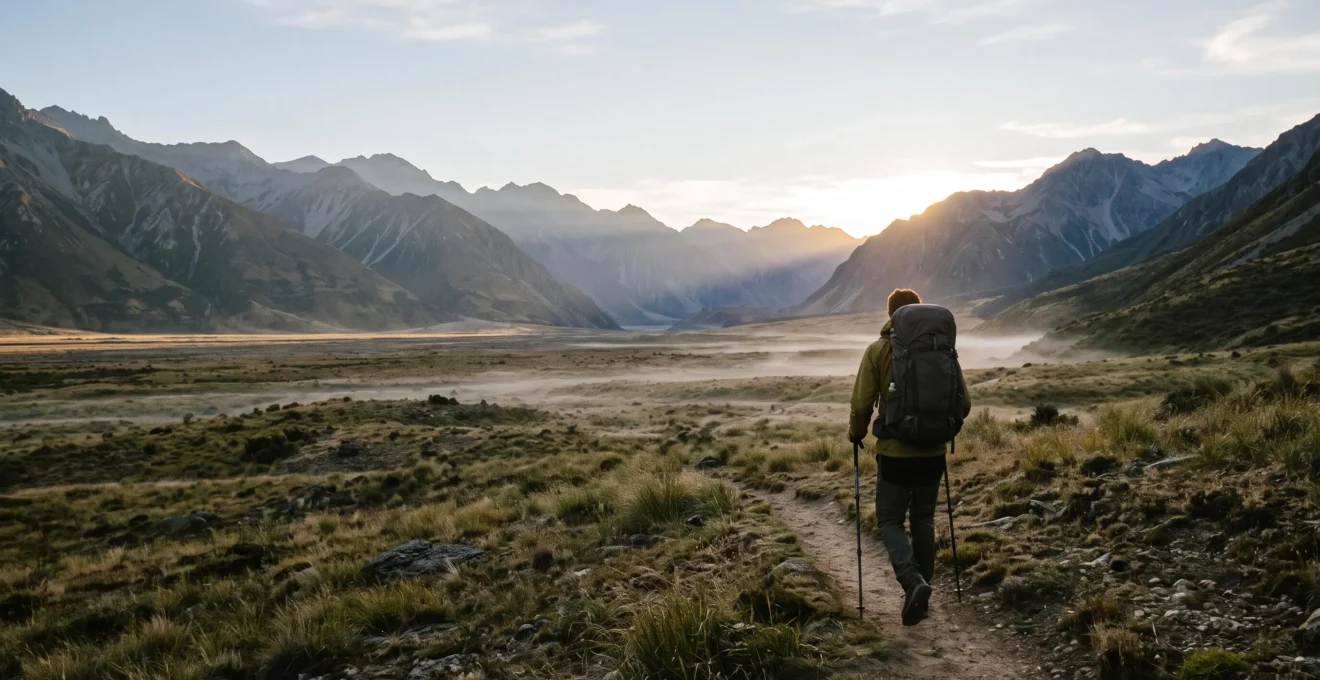
Physical fitness won’t get you through a 4-week trek; a project manager’s mindset will.
- Success hinges on de-risking three primary logistical failure points: psychological burnout, a flawed nutritional supply chain, and permit denials.
- Transitioning from week-long UK hikes to multi-week expeditions requires a fundamental shift from recreational trekking to systematic operational planning.
Recommendation: Treat your expedition as a mission-critical operation with defined stages, robust contingency plans, and clear success metrics for every logistical component.
For the seasoned UK adventurer, the call of a grander challenge is undeniable. You’ve conquered the peaks of Snowdonia, navigated the glens of the Scottish Highlands, and mastered the week-long trek. Now, the allure of a month-long, long-distance expedition—a journey measured in hundreds, if not thousands, of kilometres—beckons. But the leap from a seven-day hike to a four-week epic is not merely a matter of adding more days. It’s a complete paradigm shift in planning and execution.
Most guides focus on the familiar pillars of physical conditioning and gear lists. While essential, these are merely the entry ticket. They don’t address the real reasons why expeditions fail. The true test lies in logistics, a domain where small oversights cascade into mission-ending catastrophes. This isn’t just a longer walk; it’s a complex project demanding a coordinator’s mindset. The primary threats are not tired legs or a leaky tent, but logistical failure points: psychological burnout from a punishing schedule, a nutritional deficit from a poorly planned supply chain, or a missing permit that invalidates the entire plan.
So, what if the key to success wasn’t in your legs, but in your spreadsheet? This guide reframes the long-distance trek as an operational challenge. We will dissect the project into its critical components, moving beyond generic advice to provide a strategic framework. We’ll cover managing the psychological strain, engineering a resilient resupply strategy, navigating the bureaucratic maze of permits, and understanding the precise moment you’re ready to trade the comfort of UK hills for the rigours of the greater ranges.
This is your project plan. By breaking down the expedition into its core operational stages, you can anticipate failure points, build in redundancies, and transform an ambitious dream into a logistical masterpiece. The following sections provide the blueprints for each critical phase of your operation.
Summary: Your Project Plan for a Month-Long Expedition
- Why Do Physically Fit Trekkers Quit 1000 km Expeditions Due to Psychological Burnout?
- How to Plan 8 Resupply Packages for a 6-Week Expedition Without Nutritional Deficiency?
- Fully Self-Supported vs Resupply-Based Expeditions: Which Long-Distance Philosophy?
- The Expedition Planning Error That Causes £3000 Losses from Missing Permits
- When Can You Safely Attempt Patagonia or Himalayan Expeditions After UK Mountain Experience?
- How to Pack Enough Food for a 5-Day Trek Without Carrying Excess Weight?
- 2-Day Summit Push vs 5-Day Acclimatization: Which High-Altitude Strategy for First-Timers?
- How to Prevent Altitude Sickness on Your First High-Altitude Summit Attempt?
Why Do Physically Fit Trekkers Quit 1000 km Expeditions Due to Psychological Burnout?
The most underestimated failure point on a long-distance expedition has little to do with physical fitness. It’s the slow, creeping erosion of mental resolve. Data from major thru-hikes reveals a stark reality: only about one in four thru-hikers actually complete a 2,000+ mile trail. Many who quit are in peak physical condition. The culprit is not a lack of strength, but a lack of psychological endurance, often triggered by a poorly structured itinerary that transforms adventure into a relentless grind.
As the image above powerfully conveys, the strain is often mental, not just muscular. This exhaustion stems from the self-imposed pressure to meet arbitrary daily mileage goals. An overly rigid plan removes all spontaneity, turning the trek into a job. Every sunrise brings the pressure to perform, and every delay feels like a failure. This is the fast track to psychological burnout, where the joy of the journey is lost to the tyranny of the schedule.
The operational solution is to build a flexible, burnout-resistant itinerary. This is an exercise in proactive mental health management, not just route planning. The goal is to create a framework that allows for adaptation and recovery, rather than one that breaks under pressure. Key principles include:
- Map Key Infrastructure First: Before setting daily mileage, identify all known water sources, potential campsites, and resupply points. This creates a realistic view of what’s possible, not what’s ideal.
- Schedule ‘Zero Days’ Proactively: Build pre-planned rest days into your schedule. Treat them as strategic « pressure-release valves » and essential parts of the plan, not as signs of weakness or failure.
- Set Reasonable Mileage Targets: Your daily goal should be based on your own sustainable pace, accounting for terrain and pack weight, not the most aggressive pace found in online forums.
- Embrace a Loose Itinerary: The plan should be a guide, not a straitjacket. Allowing for spontaneous stops, side trips, or an unplanned day in a scenic spot is crucial for turning the trek back into a form of recreation.
Ultimately, a successful expedition plan prioritizes sustainability over speed. It acknowledges that the human element is the most critical and fragile part of the system.
How to Plan 8 Resupply Packages for a 6-Week Expedition Without Nutritional Deficiency?
On a multi-week expedition, your food is not just sustenance; it is your nutritional payload, and managing its supply chain is a core logistical task. For a six-week journey requiring eight resupply points, the challenge is twofold: ensuring you have enough calories to avoid a performance-degrading deficit, and preventing the « palate fatigue » that makes eating feel like a chore. A monotonous diet can be as demoralizing as bad weather.
The project management approach to this is to build a rotational menu system based on a handful of calorie-dense « anchor foods. » These are versatile, lightweight staples that form the backbone of your resupply boxes, around which you can rotate different flavours, spices, and secondary items to maintain variety. The goal is to create a system that is both nutritionally robust and psychologically satisfying.
Your planning should focus on identifying foods with the highest energy-to-weight ratio. Here are four foundational anchor foods to build a rotational menu upon:
- Olive Oil: At roughly 250 calories per ounce, this is a pure calorie booster. A small, leak-proof bottle in each resupply box allows you to enrich any meal (soups, pasta, rice) without adding significant bulk or altering flavour profiles dramatically.
- Walnuts: Providing around 185 calories per ounce, walnuts are a dense source of energy and healthy fats. They can be rotated through breakfasts (mixed with oats), snacks, or crushed into evening meals for texture.
- Peanut Butter: A long-standing hiker staple for a reason, peanut butter delivers about 166 calories per ounce. It’s highly versatile and can be used for breakfast, lunch, or as a quick energy boost. Sachets or dehydrated powder can save weight and mess.
- Almonds: Similar in density to peanut butter at 165 calories per ounce, almonds are perfect for snack rotation. Their neutral flavour makes them a welcome alternative to sweeter trail mixes, helping to combat palate fatigue over many weeks.
By building each of your eight resupply boxes around these core anchors and then systematically varying the accompanying items—different dehydrated meals, spice kits, types of dried fruit—you create a resilient system that prevents both nutritional deficiency and the mental drain of a boring diet.
Fully Self-Supported vs Resupply-Based Expeditions: Which Long-Distance Philosophy?
Before you calculate a single calorie or map a single kilometre, you must make a fundamental strategic decision that will define your entire expedition: what is your operational philosophy? The choice between a fully self-supported and a resupply-based approach dictates your schedule, your pack weight, your risk exposure, and the very character of your journey. This isn’t just a practical choice; it’s a commitment to a specific style of trekking.
As the forking trail suggests, these are two distinct paths. The self-supported trekker embraces a heavier pack for greater freedom, carrying all necessary supplies between infrequent, major stops. The resupply-based trekker accepts the constraints of logistics—mail drops, town opening hours—in exchange for a lighter pack and more frequent access to comfort and variety. Understanding the trade-offs is critical to aligning your strategy with your personal risk tolerance and the nature of the trail itself.
The following table breaks down the core differences in this strategic choice, treating each as a distinct operational model with its own set of risks and rewards.
| Criteria | Fully Self-Supported | Resupply-Based |
|---|---|---|
| Pack weight | Higher (must carry all food/fuel between long stretches) | Lower (frequent restocking at towns or caches) |
| Schedule freedom | High — not tied to shipping or town hours | Constrained by mail windows, post office hours, and town logistics |
| Primary risk factor | Injury and fatigue from carrying more weight | External failures: shipping delays, closed services |
| Best suited terrain | Remote trails with scarce, unreliable water/towns | Trails with frequent, reliable town access |
Ultimately, there is no universally « correct » answer. The right choice depends on a frank assessment of the trail’s infrastructure (are towns frequent and reliable?) and your personal priorities (is ultimate freedom worth the physical cost of a heavier pack?).
The Expedition Planning Error That Causes £3000 Losses from Missing Permits
In expedition planning, the most expensive mistake is often not related to gear, but to paperwork. For many of the world’s premier long-distance trails, particularly in the US, access is governed by a highly competitive permit system. Underestimating this bureaucratic hurdle is a catastrophic logistical failure. Missing out on a permit can invalidate months of planning and non-refundable travel bookings, leading to significant financial losses.
The core of the problem is a simple supply-and-demand imbalance. For iconic routes like the John Muir Trail, the number of applicants far exceeds the available slots. For example, during the most desirable periods, it’s not uncommon for about 70 percent of applicants seeking a peak-season starting date to fail to secure a permit through the initial lottery. Believing you will be in the lucky 30% without a backup plan is not a strategy; it is a gamble.
From a project management perspective, the permit lottery is a known risk that requires contingency planning. Success is not about winning the lottery on the first try, but about having a systematic « second-chance » strategy in place. This transforms you from a hopeful applicant into a prepared operator. Your Plan B should be as well-researched as your Plan A.
Here is a four-step contingency strategy for when you miss the initial permit lottery:
- Understand the Allocation System: Realize that lottery reservations often cover only a portion (e.g., 60%) of total permits. A significant percentage (e.g., 40%) are typically held back for « walk-up » or first-come, first-served allocation.
- Plan for a Walk-Up Attempt: If walk-up permits are an option, integrate this into your travel plan. This means arriving at the designated ranger station a day or two before your intended start date to queue. This requires flexibility in your travel schedule.
- Monitor for Cancellations: Forfeited or cancelled reservations are often re-released online. Diligently monitoring the official reservation portal in the weeks leading up to your trip can reveal newly available slots.
- Develop a Permit-Free Backup Route: The ultimate contingency is having a compelling, permit-free Plan B route in the same region. This ensures that your travel investment is not wasted and you still have a world-class adventure, even if your first choice is unavailable.
By treating the permit process as a logistical challenge with multiple solution paths, you de-risk one of the biggest potential points of failure in any major expedition.
When Can You Safely Attempt Patagonia or Himalayan Expeditions After UK Mountain Experience?
The transition from experienced UK hillwalker to international expedition member is a significant step-up in commitment, risk, and required skill. While navigating Crib Goch in Snowdonia or winter conditions in the Cairngorms builds a fantastic foundation of resilience and navigation, the « greater ranges » of Patagonia or the Himalayas introduce new, non-negotiable complexities: extreme altitude, severe weather volatility, and significant logistical dependencies.
The key principle to manage this transition is progressive skill-building. You cannot simply extrapolate your UK experience and assume it will suffice at 5,000 metres. Each new environment requires a deliberate process of learning and adaptation. A powerful illustration of this is the approach to high-altitude mountaineering. For example, the painstaking process of establishing and acclimatizing through a sequence of camps before a final summit push on Mount Everest, such as from the South Col to Camp 4, shows that each stage is a prerequisite for the next. You cannot skip the lower, less extreme stages and expect to succeed at the highest, most hazardous ones. Proficiency gained at one altitude is the ticket to attempt the next.
Before committing to a major international expedition, you must treat your preparation as a formal project. This means going beyond physical training and creating a comprehensive planning checklist to ensure all logistical and safety bases are covered.
Here is a checklist of critical operational steps to take before your first major expedition to Patagonia or the Himalayas:
- Resolve Permits and Bureaucracy First: This is described by experts as « job number one. » All in-country permits, visas, and other red tape must be dealt with months in advance.
- Hire an In-Country Agent: For complex logistics like transport, permits, and local supplies, the modest cost of a local agent is often invaluable. Their knowledge and contacts can save you immense time and prevent critical errors.
- Decide on Your Team Structure: Make a deliberate choice between a solo attempt, a partnership, or a larger team. Carefully weigh the increased safety and shared workload of a team against the flexibility of a solo trip.
- Consider a Guided Expedition for Your First Time: If it is your first foray into a major international range, using an established expedition company is a wise move. It allows you to focus on your personal performance and learn the logistical ropes under expert guidance.
This systematic approach ensures you arrive at the trailhead not just physically fit, but logistically and mentally prepared for the increased scale of the challenge.
How to Pack Enough Food for a 5-Day Trek Without Carrying Excess Weight?
For any trek, from a weekend trip to a multi-week expedition, the fundamental equation of food packing remains the same: maximise energy while minimizing weight. The key to solving this is not simply packing more food, but packing smarter food. The governing principle is calorie density, measured in calories per ounce or per 100 grams. Mastering this concept is the difference between a heavy, cumbersome pack and a light, efficient one.
The impact of focusing on calorie density is dramatic and quantifiable. For a trekker needing a demanding 5,000 calories per day, the weight of their food can vary enormously. For instance, reaching a 5,000-calorie target requires nearly 4 pounds of food at a low density of 80 kcal/oz, but only 2.5 pounds at a higher density of 125 kcal/oz. Over a 5-day trek, that’s a saving of 7.5 pounds (or about 3.4 kg)—a massive reduction that translates directly to less fatigue and a lower risk of injury.
The operational task, therefore, is to engineer a fuel plan that consistently exceeds the standard backpacking food benchmark of around 100 kcal/oz. This involves building your menu around foods that are high in fats and low in water content. Fats provide about 9 calories per gram, compared to only 4 for carbohydrates and proteins, making them the most efficient fuel source by weight.
Your food bag should be dominated by items from the higher end of the density spectrum. Think of it as a portfolio investment, where you want to maximize your return (calories) for a given investment (weight). High-performers include:
- Oils (e.g., Olive Oil): The undisputed champion at ~250 kcal/oz.
- Nuts and Nut Butters: Macadamia nuts (~204 kcal/oz), walnuts (~185 kcal/oz), and peanut butter (~170 kcal/oz) are your workhorses.
- Seeds: Sunflower and chia seeds are excellent, dense additions.
- High-Cacao Dark Chocolate: Provides a morale boost and solid energy at ~155 kcal/oz.
By consciously selecting foods based on their calorie density, you are not just packing food; you are designing a lightweight, high-performance fuel system for your body.
This methodical approach moves you away from guesswork and towards a predictable, optimized system that saves weight and improves performance on the trail.
2-Day Summit Push vs 5-Day Acclimatization: Which High-Altitude Strategy for First-Timers?
When planning a first-time high-altitude summit attempt, you will face a critical decision regarding your ascent profile. Broadly, the options fall into two categories: a rapid, 2-day « lightning ascent, » often involving vehicle support to a high starting point, versus a slower, 5-day progressive acclimatization, which involves trekking up gradually. For a first-timer, this is not a choice of convenience; it is a fundamental risk management decision.
The human body is not designed for rapid changes in altitude. The physiological process of acclimatization—producing more red blood cells to carry oxygen more efficiently—takes time. Rushing this process dramatically increases the risk of Acute Mountain Sickness (AMS), a condition that can be debilitating and potentially life-threatening. The data is unequivocal: a faster ascent equals higher risk. For example, in a study of lowland trekkers ascending to 5,300m, a study of 332 lowland-dwelling trekkers found the overall occurrence of AMS was 73.5%, highlighting how common the condition is even on staggered journeys. Another study of pilgrims ascending rapidly in Nepal reinforced that the rate of ascent was a key factor in developing AMS.
From an operational standpoint, the choice of ascent profile must be driven by safety and probability of success, not by speed or cost. The following risk matrix compares the two primary strategies:
| Factor | 2-Day ‘Lightning Ascent’ | 5-Day ‘Progressive Ascent’ |
|---|---|---|
| Ascent method | Rapid, often assisted by vehicle or short trek | Gradual walking ascent with staged camps |
| Relative AMS risk | Substantially higher — rapid ascent by air/vehicle is associated with roughly 4.5 times higher AMS incidence than gradual approaches | Lower — walking or combined ascent is associated with only about 2.1% increase in incidence |
| Decision points to turn back | Few — commitment is high once the push begins | Multiple built-in rest/decision days |
| Cost and time | Lower | Higher |
While a lightning ascent may seem tempting for its efficiency, it is a high-stakes gamble. A progressive, 5-day acclimatization schedule is not a luxury; it is the most reliable operational method for maximizing your chances of a safe and successful summit on your first high-altitude attempt.
Key Takeaways
- Expedition success is a project management task, not a fitness test. Your primary focus should be on identifying and mitigating logistical failure points.
- Your resupply strategy must be a robust system designed to combat palate fatigue and maximise calorie density, not just count calories.
- Acclimatisation is a non-negotiable physiological process. A slow, progressive ascent profile is the primary operational tool to manage altitude sickness risk.
How to Prevent Altitude Sickness on Your First High-Altitude Summit Attempt?
Successfully preventing Acute Mountain Sickness (AMS) on your first high-altitude expedition comes down to one core principle: giving your body the time it needs to adapt. AMS is a direct physiological response to ascending too high, too fast. The prevalence of the condition rises sharply with elevation; a study of 1,370 mountaineers in the Western Alps found AMS prevalence rising to 21.9% at 4,559 meters on the day of ascent. This is not a matter of fitness—world-class athletes are just as susceptible as recreational hikers. It is a matter of physiology.
The golden rules of prevention are procedural: ascend slowly, allow for rest days, and never ascend to sleep if you are feeling symptoms. A common guideline is to not increase your sleeping altitude by more than 500 metres per day once above 3,000 metres, and to include a rest day for every 1,000 metres of elevation gained. Hydration and proper nutrition support this process, but they cannot replace a safe ascent rate.
Beyond a slow ascent, the most critical tool in your operational toolkit is diligent self-monitoring. You must learn to distinguish between normal trail fatigue and the specific warning signs of AMS. Dismissing a persistent headache as simple tiredness can be a dangerous mistake. Using a standardized system, like the Lake Louise Score, allows you to objectively track your symptoms daily and make informed decisions.
This checklist provides a clear framework for assessing symptoms and taking appropriate action. It is a non-negotiable safety protocol for any high-altitude trekker.
Red Flag Checklist for AMS Symptom Severity
- Assess Mild Symptoms: A Lake Louise Score of 1-2, typically involving a mild headache or fatigue. The correct action is to rest at your current altitude, hydrate, and monitor symptoms closely before considering any further ascent.
- Identify Moderate Symptoms: A score of 3-4, with a worsening headache that doesn’t respond to simple painkillers, dizziness, or nausea. Action required: stop your ascent immediately and seriously consider descending to the last altitude where you felt well.
- Recognize Severe Symptoms: A score of 5 or higher, or any signs of ataxia (loss of coordination) or severe shortness of breath at rest. This is a medical emergency. The only effective action is to descend immediately, even if it’s at night.
- Implement Daily Tracking: Log your symptoms every morning and evening using the same scale. This creates a baseline and helps you catch a negative trend early, rather than dismissing gradual worsening as normal fatigue.
By combining a conservative ascent profile with rigorous, honest self-monitoring, you shift from hoping you won’t get sick to actively managing the risk. This expeditionary mindset is the final, and most important, piece of your logistical plan for a safe and successful high-altitude journey.