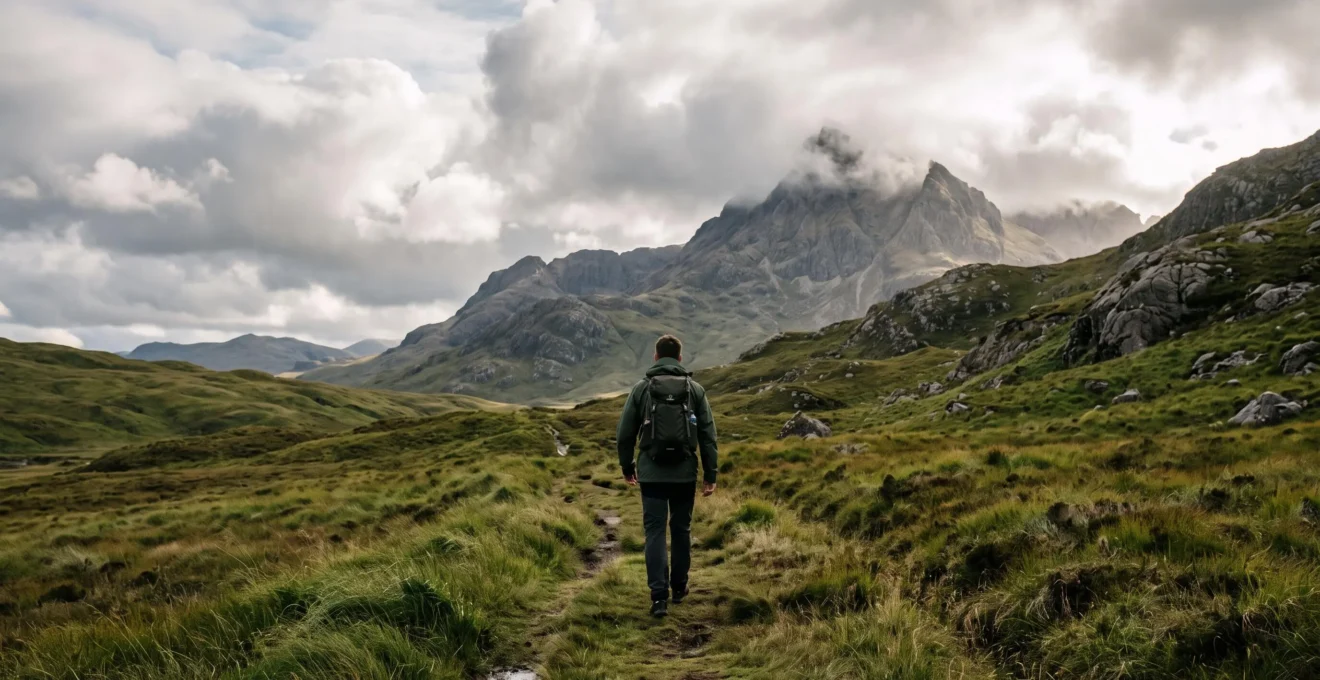
Many UK walkers hit a plateau, confident on hills but unsure how to safely tackle major mountains. The key isn’t just fitness, but a fundamental shift in mindset to manage a more consequential environment. This guide provides a clear progression model, focusing on interpreting mountain-specific risks—from weather and quad burn to scrambling—enabling you to build the judgment needed to safely stand on your first major summit.
You stand at a trailhead in the Lake District or Snowdonia, looking up. You’ve walked countless miles across the rolling hills of the South Downs or the Peak District’s lower edges. You’re fit, you have good boots, and you love the outdoors. Yet, the jagged ridgeline of Helvellyn or the imposing mass of Yr Wyddfa (Snowdon) feels like a different world. You’re right. It is. Many walkers assume the step up to ‘proper’ mountains is simply a matter of more distance and more ascent. They pack an extra sandwich and hope for the best.
This approach misunderstands the fundamental nature of the challenge. The difference between a hill and a mountain in the UK is not just a matter of altitude; it’s a dramatic escalation in consequence. A simple trip on a lowland path might result in muddy trousers; on an exposed mountain ridge, it can be catastrophic. The environment itself becomes an active force—wind doesn’t just cool you, it can knock you off balance; rain doesn’t just get you wet, it can lead to hypothermia with shocking speed.
But if the real key isn’t just buying more expensive gear or developing superhuman cardio, what is it? The answer lies in developing judgment. This guide is built on a single principle: progressing to mountain hiking is about learning to see, interpret, and manage a new level of risk. It’s about understanding the ‘why’ behind the safety rules, not just following a checklist. We will break down the specific challenges—unpredictable weather, punishing terrain, and the crucial distinction between walking and scrambling—to build your competence and confidence from the ground up, the way a professional mountain leader would.
This article provides a structured approach to help you bridge the gap between lowland comfort and mountain competence. The following sections break down the essential knowledge you need to progress safely and enjoyably.
Summary: Your Path from Hill Walker to Mountaineer
- Why Do UK Mountains Cause 15x More Rescues Than Lowland Trails Per Mile?
- How to Read Mountain Weather Forecasts to Decide Go or No-Go for Your Hike?
- Guided Mountain Hike vs Solo Attempt: Which Approach for Your First Munro?
- The Mountain Hiking Mistake That Causes 50% of Ankle Injuries on Scree Slopes
- When Are You Ready to Hike UK Mountains Solo Without a Guide?
- Why Do Your Quads Burn on Steep Ascents Even When Your Cardio Feels Fine?
- Why Does Scrambling Terrain Carry 10x the Injury Risk of Steep Hiking?
- How to Know When a Route Becomes Scrambling Rather Than Hiking?
Why Do UK Mountains Cause 15x More Rescues Than Lowland Trails Per Mile?
The stark reality of UK mountain risk is written in the logs of the volunteer Mountain Rescue teams. A single popular peak like Yr Wyddfa/Snowdon sees so many incidents that the local Llanberis team averages nearly one rescue per day. This isn’t because the mountain is exceptionally difficult, but because it concentrates risk. The core difference is consequence. On a lowland trail, a twisted ankle is an inconvenience. On the Pyg Track, halfway down from a summit with darkness falling, it’s a full-blown emergency requiring a dozen volunteers.
The numbers paint a clear picture. According to recent Mountain Rescue England and Wales data, teams responded to 3,842 callouts in a single year. What’s most telling for the progressing walker is *when* these incidents occur: a staggering 78% happen after midday. This points to the « Descent Trap. » Walkers often budget their energy and daylight for the ascent, only to find the descent on tired legs, over steep and rocky ground, is more technically demanding and dangerous. Fatigue clouds judgment, and a small navigational error or slip becomes much more likely.
This is why the mountain environment is so much more demanding than a simple calculation of distance and ascent might suggest. Unlike a gentle hillside, a mountain’s terrain, weather, and the hiker’s own physical state are constantly interacting. A drop in temperature, a sudden crosswind on an exposed ridge, and tired leg muscles combine to create a hazard far greater than the sum of its parts. Understanding this multiplication of risk is the first and most critical step in your progression.
How to Read Mountain Weather Forecasts to Decide Go or No-Go for Your Hike?
Relying on the generic weather app on your phone is one of the most common and dangerous mistakes a hill walker makes when moving to the mountains. Valley weather is not mountain weather. A pleasant, breezy day in Llanberis can be a brutal, dangerously windy ordeal at 1,000 metres. The key is to use a dedicated mountain forecast, such as the Mountain Weather Information Service (MWIS) or the Met Office’s Mountain Forecasts, which provide details for specific summits and altitudes.
The two most critical factors you need to learn to interpret are wind speed and its effect on temperature. Wind not only affects your balance but also dramatically accelerates heat loss through wind chill. As mountain safety guidance explains, a summit temperature of 5°C, which may sound mild, can feel like a biting -5°C in a 40mph wind. This is how easily manageable conditions can rapidly become hypothermic without the right gear and knowledge.
You must translate these numbers into a go/no-go decision before you even leave the car. For wind speed at your planned summit altitude:
- Under 20mph: Generally comfortable conditions.
- 20-35mph: Breezy. It will be noisy and will start to affect your balance on exposed ridges. You’ll need to be more deliberate with your footing.
- 35-50mph: Progress becomes difficult. Ridge walking is unpleasant and potentially dangerous. This is a clear signal to choose an alternative, more sheltered route or cancel.
- Above 50mph: Avoid all high, exposed ground. Even experienced mountaineers will be turning back in these conditions.
Remember that forecasts are most reliable only 24-36 hours ahead. Always re-check the forecast on the morning of your hike, as conditions can and do change rapidly.
Guided Mountain Hike vs Solo Attempt: Which Approach for Your First Munro?
Once you’ve decided to tackle your first major peak, a « Munro » in Scotland or its equivalent in England and Wales, you face a crucial choice: hire a qualified Mountain Leader or go it alone? There is no right answer, but understanding what each path offers is key. This isn’t a question of courage versus caution; it’s a strategic decision about your learning process.
Hiring a guide is an investment in accelerated, safe learning. A good Mountain Leader or Mountaineering and Climbing Instructor (MCI) does far more than just show you the way. They are your safety net. They manage the route, constantly assess the weather and ground conditions, and carry emergency equipment. More importantly, they are a live-action instructor. As you walk, they will be pointing out subtle navigational cues, explaining their weather assessments in real-time, and coaching you on efficient movement. You can learn more in one day with a good guide about practical mountaincraft than you might in a dozen solo trips. It’s the fast-track option for building a solid foundation of skills and confidence.
The solo attempt, or a trip with peers of similar ability, represents a different kind of learning. It forces you to take full ownership of every decision: route planning, navigation, timing, and risk assessment. This is where your theoretical knowledge is truly tested. The process must be far more deliberate and conservative. You should start with a well-trodden, popular mountain on a day with a perfect forecast. You must be disciplined enough to turn back if anything—the weather, your energy levels, the time—starts to feel wrong. A successful solo trip is immensely rewarding and a true measure of your growing competence, but it requires absolute honesty about your own limitations.
The Mountain Hiking Mistake That Causes 50% of Ankle Injuries on Scree Slopes
The mistake is deceptively simple: descending on loose, rocky ground with stiff legs and a high centre of gravity. Walkers accustomed to solid lowland paths often try to brake their way down steep scree or broken ground, locking their knees and ankles. This technique is not only exhausting but also incredibly dangerous. A stiff leg acts like a lever, transferring the entire shock of a slip or a rolling rock directly into the knee or ankle joint. This is a recipe for sprains and fractures.
The correct approach is to work *with* gravity, not against it. This means keeping your knees bent and soft, your body low, and your steps deliberate. Using trekking poles is a game-changer here. They provide two extra points of contact, dramatically improving stability. More than that, they absorb a huge amount of the impact that would otherwise go through your joints. In fact, trekking pole research shows that they can achieve an up to 25% reduction in knee impact on descents. This saves your joints and, crucially, conserves energy and reduces fatigue-related errors.
Descending safely on scree is a specific skill that requires conscious practice. It’s about changing your mindset from simply ‘walking downhill’ to ‘managing a controlled descent on unstable terrain’. Each step is a calculated placement, not a thoughtless stride.
Action Plan: Crossing Loose Scree Safely
- Test Everything: Before committing your weight, kick steps with your toes and test each handhold and foothold. Don’t trust the surface to be stable.
- Three Points of Contact: Edge your boots into the hill and aim to maintain at least three points of contact with the ground at all times (e.g., two feet and a pole, or one foot and two hands).
- Keep Knees Soft: Maintain a low centre of gravity with soft, bent knees. Avoid locking your ankle rigidly, as a stiff leg transfers shock straight into the joint.
- Face the Slope: On very steep or unstable ground, it is safer to face uphill (or into the slope) and descend backwards, as you would on a ladder.
- Switchback Your Descent: Avoid going straight down the fall line. Traverse across the slope in a zig-zag pattern, which is safer, more controlled, and easier on your joints.
When Are You Ready to Hike UK Mountains Solo Without a Guide?
This is the question every aspiring mountaineer asks. The answer has nothing to do with how many peaks you’ve ‘bagged’ or how fast you can walk. It’s about having a proven, reliable toolkit of skills and, more importantly, the judgment to know when and how to use them. Being ready for a solo mountain day means you are self-sufficient. It means you can be your own guide, your own navigator, and your own rescuer in the initial moments of an incident.
Before you even consider it, you should be able to honestly answer « yes » to the following questions. This isn’t a checklist to be ticked; it’s a framework for self-assessment.
- Navigation: Can you confidently navigate with a map and compass in poor visibility? Not just follow a path, but relocate yourself from a known feature if you become disoriented in mist? Do you carry a GPS device or phone with mapping as a backup, and a power bank to sustain it?
- Weather Assessment: Do you *always* check a mountain-specific forecast before you leave? Do you understand what it means for your chosen route? More critically, can you read the weather in real-time? Do you know what lenticular clouds or a rapid drop in pressure signify?
- Emergency Preparedness: Do you carry an emergency shelter (a ‘bothy bag’ or group shelter) and know how to use it? Do you have a headtorch with spare batteries, even on a summer’s day? Do you have a first aid kit and the knowledge to treat a common injury like a sprain or a deep cut?
- Experience in Adversity: Have you been out in bad weather—heavy rain, strong winds, poor visibility—while with a more experienced person or guide? A solo trip on a blue-sky day is not the time to discover how you react when conditions turn against you. True competence is built by experiencing and managing adversity in a controlled way first.
If you find yourself hesitating on any of these points, it’s a sign that you have more to learn. That’s not a failure; it’s a sensible part of the process. Join a club, hire a guide for a specific skills course (like a ‘bad weather navigation’ day), or practice with experienced friends. The mountains will always be there. Your goal is to ensure you’ll always be able to walk away from them safely.
Why Do Your Quads Burn on Steep Ascents Even When Your Cardio Feels Fine?
It’s a familiar and frustrating feeling for many walkers making the leap to steeper ground. Your lungs and heart feel fine, you’re not out of breath, but your quadriceps are screaming. It feels like you’re trying to push a car uphill. This happens because of a fundamental difference in biomechanics between walking on the flat and climbing a steep gradient. On a gentle slope, your body uses a cycle of momentum and skeletal support. On a steep ascent, you are constantly fighting gravity, forcing your large leg muscles—primarily the quads and glutes—to perform a continuous series of step-ups. Without a specific technique, these muscles never get a moment’s rest.
The biomechanics are clear: continuous, unbroken stepping on a steep incline exhausts the muscles long before the cardiovascular system reaches its limit because there is no recovery phase. Each step is a new, isolated effort. The solution, used by mountaineers for over a century, is a technique designed to deliberately reintroduce a recovery phase: the Mountaineer’s Rest Step.
It’s a simple, rhythmic technique that feels counter-intuitively slow at first but is monumentally efficient. It works by shifting your body weight onto your locked skeleton for a brief moment with each step, allowing your muscles to relax completely. It’s not about stopping; it’s about building a micro-rest into every single movement.
- Step and Lock: As you step up, lock the knee of your downhill/rear leg and shift your weight back onto it. For a split second, your straight leg’s bones, not your muscles, are taking your full body weight.
- Muscle Relaxation: In this locked position, your uphill leg is unweighted, and your rear leg’s muscles can momentarily relax. This is the ‘rest’ in the rest step.
- Breathe and Repeat: Synchronise your breathing. A common rhythm is to inhale as you step up with your lead foot, then exhale fully as you lock your rear leg and enter the ‘rest’ phase. Let momentum, not a forceful push, carry your leading leg forward for the next step.
Mastering this technique transforms your uphill experience. It turns a punishing, muscle-burning slog into a sustainable, rhythmic ascent, allowing you to conserve energy for the entire day.
Why Does Scrambling Terrain Carry 10x the Injury Risk of Steep Hiking?
The risk profile of scrambling is an order of magnitude higher than steep hiking primarily due to one factor: exposure. Exposure is the climber’s term for the sense of space and the potential consequences of a fall. On a steep, grassy hillside, a slip might result in a slide of a few metres. On a Grade 1 scramble like Crib Goch’s ridge, the technical moves may be simple, but they are performed above a drop of hundreds of metres. The consequence of a slip is no longer a graze but a catastrophic fall.
This is powerfully illustrated by the fact that Crib Goch is graded as an easy Grade 1 scramble, yet it is the scene of frequent rescues every year. People who are perfectly competent walkers become ‘crag-fast’—frozen by fear and unable to move forwards or backwards—because they were unprepared for the immense psychological pressure of the exposure. They did not fall because the moves were too hard, but because their mind was overwhelmed by the consequence of failure.
Scrambling introduces a new set of demands beyond leg strength and stamina. As the Cotswold Outdoor team notes, « scrambling demands balance, upper body strength, and a good head for exposure. » You are no longer just walking; you are climbing. You must think about handholds and footholds, maintaining three points of contact, and assessing the quality of the rock. It requires a calm, focused mindset that can be difficult to maintain when your adrenaline is pumping. This combination of physical and psychological demands, coupled with severe consequences, is what makes scrambling a fundamentally different and more dangerous activity than hiking, even when the terrain looks only marginally steeper.
Key takeaways
- UK mountain risk is defined by consequence and rapid weather changes, not just difficulty. A simple slip or a poor forecast can have severe outcomes.
- Progression is about building judgment: learning to read mountain forecasts, understand terrain (scree, scrambling), and manage your energy (rest step).
- A solo attempt on a major mountain is the final exam, not the starting point. Be honest about your skills in navigation, emergencies, and weather before you commit.
How to Know When a Route Becomes Scrambling Rather Than Hiking?
For the walker progressing onto steeper, rockier ground, this is the most important question. There is no signpost that says « Hiking ends here, scrambling begins. » The transition is often gradual, and being able to recognise it before you are overly committed is a critical safety skill. At its simplest, as Emily Woodhouse puts it, scrambling is « using your hands to help you get up a slope or ridgeline in the mountains. » If your hands are consistently needed for upward movement, not just for a quick touch for balance, you are scrambling.
You can use a few practical field tests to assess the terrain in front of you:
- The Hands Test: Are you occasionally touching the rock for balance, or are you actively pulling yourself up with your hands? Consistent hand use means you’ve crossed into scrambling.
- The Path Test: Does the route follow a clear, well-trodden path, or has it disappeared into a jumble of rocks where you need to pick your own line? Scrambles rarely have obvious paths.
- The Reversibility Test: Look at the section ahead. Would you feel comfortable coming back down it? A classic mistake is to climb up a section that is far too difficult to descend safely, trapping you.
Once you recognise you are on scrambling terrain, you need to understand that a grading system applies, which dictates the level of difficulty and commitment. Your standard hiking kit is generally sufficient for Grade 1, but anything beyond that requires a different mindset and often, different gear.
The following table, based on information from expert sources like At the Edge Mountaineering, breaks down the UK scrambling grades:
| Grade | Hand Use | Exposure & Commitment | Typical Gear |
|---|---|---|---|
| Grade 1 | Occasional use of hands for balance; limited technical difficulty | Exposure can be significant even though moves are easy | Standard hiking kit |
| Grade 2 | Sustained hands-on climbing moves and greater commitment | Increased exposure; good footwork and calm judgement essential | Helmet often recommended; rope for some parties |
| Grade 3 | Near-continuous climbing movement, close to rock climbing | High exposure, escape often difficult | Rope, harness and protection generally required |
The mountains are waiting. By progressing deliberately, respecting the environment, and building your judgment step by step, you can ensure every summit is not just a destination reached, but a safe and rewarding achievement. Your next step is to apply these principles to planning your first, carefully chosen mountain walk.