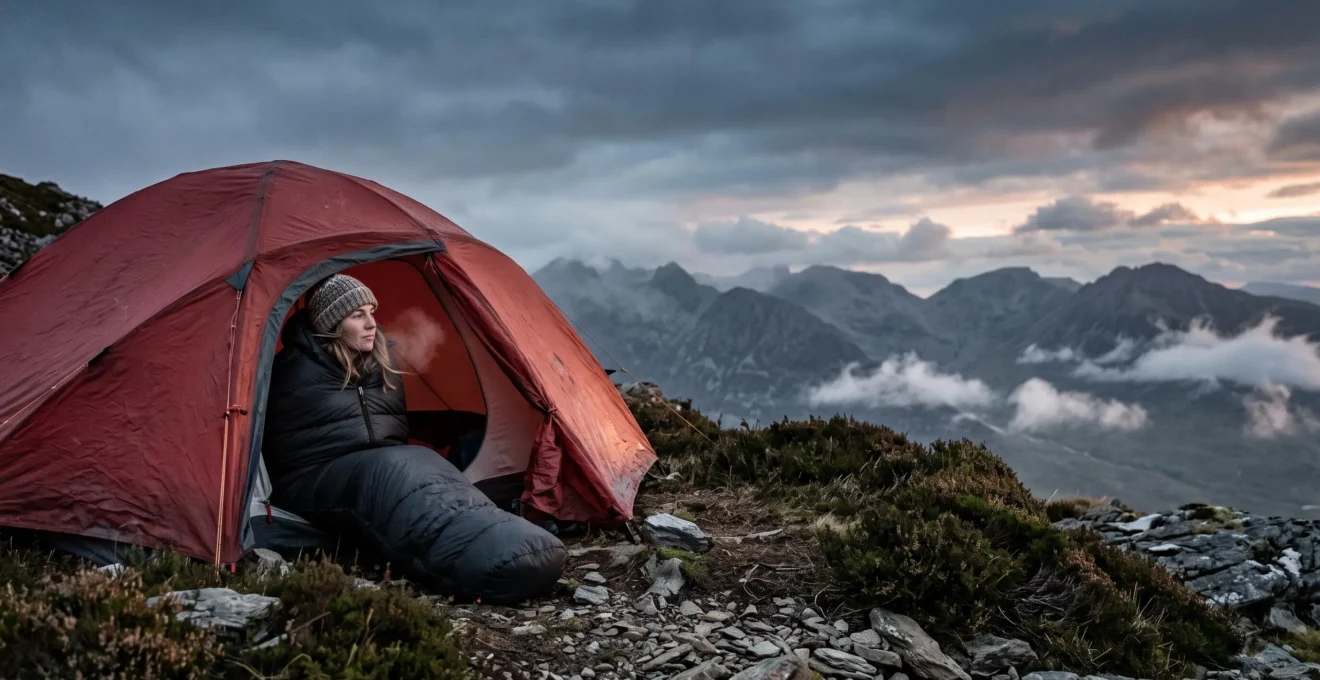
A sleeping bag’s temperature rating is a poor predictor of real-world warmth, especially on a damp UK mountainside.
- Ratings are based on a standardised mannequin in a lab, ignoring your metabolism and, crucially, cold seeping up from the ground.
- Your sleeping mat’s R-value is often more critical than the bag itself for preventing conductive heat loss and ensuring a warm night.
Recommendation: Stop choosing a sleeping bag in isolation. Start building a complete sleep system (bag + mat + accessories) for guaranteed warmth and restorative sleep.
You’ve been there. Tucked into a sleeping bag rated for 0°C on a 5°C night in the Peak District, yet you’re shivering, unable to sleep. You followed the advice, you bought the « right » gear, but the cold still found its way in. This frustrating experience is common and it’s not your fault. The outdoor industry has taught us to focus on a single, often misleading, number on a sleeping bag’s tag. We’ve been told to compare down versus synthetic, or to look at fill power, but these are only pieces of a much larger puzzle.
The conventional wisdom about temperature ratings is fundamentally flawed because it treats a sleeping bag as an isolated object. The reality of staying warm outdoors, especially in the damp and unpredictable UK climate, is a matter of thermodynamics. True comfort isn’t about buying a single « warm » bag; it’s about managing heat loss across an entire system. What if the secret to a warm night had less to do with the bag’s price tag and more to do with the forgotten component lying beneath you?
This guide will deconstruct the myth of the temperature rating. We will move beyond the marketing and into the science of thermal efficiency. We’ll explore why those lab tests fail in the real world, how to intelligently boost your current gear’s performance, and when the insulation in your sleeping mat becomes the most critical factor for survival and comfort. By the end, you won’t just know how to choose a bag; you’ll know how to build a sleep system that truly keeps you warm.
To navigate this complex topic, this article breaks down the essential components of a reliable sleep system, guiding you from understanding the theory to making practical gear choices for your UK adventures.
Summary: A Systematic Guide to Sleeping Warm in the UK Mountains
- Why Do « Comfort 0°C » Sleeping Bags Leave 50% of Users Cold at 5°C?
- How to Add 10°C of Warmth to Your Sleeping Bag with Affordable Accessories?
- Down vs Synthetic Sleeping Bags: Which Insulation for Damp British Camping?
- The Storage Error That Destroys £400 Down Sleeping Bag Loft Permanently
- When Does Your Sleeping Mat’s R-Value Become More Critical Than Bag Temperature Rating?
- Why Do Autumn Hiking Boots Fail Catastrophically on Winter Snowshoe Trips?
- How to Select Between Bivvy Bags and Tarp Shelters for Scottish Mountain Bivouacs?
- How to Plan Your First Multi-Night Camping Trip Without Gear Mistakes?
Why Do « Comfort 0°C » Sleeping Bags Leave 50% of Users Cold at 5°C?
The core reason for the frustrating gap between a sleeping bag’s rating and your real-world experience is that the rating isn’t for you. It’s for a robot. The EN/ISO 23537 standard, which governs these ratings, uses thermal mannequins with specific, unchangeable characteristics in a controlled lab environment. This process measures heat loss to determine the « Comfort, » « Limit, » and « Extreme » ratings, but it relies on a set of perfect-world assumptions that rarely hold true on a damp hillside in Snowdonia.
The « standard man » is 25 years old, 1.73m tall, and weighs 73kg, while the « standard woman » is 25, 1.60m, and 60kg. The official testing methodology confirms that the ISO 23537 test relies on a fixed ‘standard’ body profile that almost certainly doesn’t match your own age, weight, or metabolism. If you’re a « cold sleeper, » tired after a long hike, or haven’t eaten a high-energy meal, your body is producing less heat than the mannequin, and the bag’s performance will drop accordingly. The rating is a starting point, not a guarantee.
This highlights the central flaw in conventional thinking. A sleeping bag doesn’t generate heat; it only slows down the rate at which you lose the heat your body produces. Therefore, its performance is just one part of a larger thermodynamic balance. As the experts at Backpacking Light put it, « Sleeping bags or quilts are just one part of a system to keep you warm at night. » Thinking in terms of a complete sleep system—bag, mat, clothing, and even shelter—is the only way to reliably achieve warmth.
How to Add 10°C of Warmth to Your Sleeping Bag with Affordable Accessories?
Before rushing to buy a new, more expensive sleeping bag, the most cost-effective way to improve your sleep system’s warmth is by upgrading its components. The right accessories can dramatically boost insulation and comfort, effectively lowering your bag’s temperature rating by as much as 10-15°C. The most powerful tool in this arsenal is the sleeping bag liner, which works by trapping an additional layer of air between your body and the bag’s main insulation.
However, not all liners are created equal. The material dictates their thermal performance, weight, and suitability for different conditions. Understanding the options is key to making an intelligent upgrade:
- Silk Liners: These are lightweight and excellent for moisture-wicking comfort on multi-day treks. They add a modest but noticeable warmth boost of around 2-3°C.
- Thermal Liners (e.g., Thermolite/Reactor): Offering the best warmth-to-weight ratio, these are the backpacker’s choice. They can consistently add 5-8°C of warmth, making a three-season bag viable in colder shoulder-season conditions.
- Fleece/Microfleece Liners: These are the warmest option, capable of adding a significant thermal boost. However, their bulk and weight make them best suited for car camping or as an emergency layer for extreme cold snaps, not for lightweight backpacking.
- Cotton Liners: These should be avoided for warmth. Their primary function is hygiene, as they are easy to wash. They absorb moisture and can actually make you feel colder in damp UK conditions.
Beyond liners, simple changes like wearing a dry set of merino wool base layers, a warm hat, and thick socks to bed can add several degrees of warmth. The goal is to build a layered system that traps as much still air as possible, turning your single sleeping bag into a multi-layered cocoon of warmth.
Down vs Synthetic Sleeping Bags: Which Insulation for Damp British Camping?
The choice between down and synthetic insulation is the classic camper’s dilemma, and for good reason. In the context of the UK, where damp air and condensation are near-constants, the answer isn’t simple. Traditionally, synthetic was the default choice for wet conditions, as it retains some of its insulating structure even when damp. Down, while offering unparalleled warmth-to-weight, was notorious for collapsing into a useless, cold clump when wet.
However, technology has evolved. The advent of hydrophobic down treatments has significantly changed the equation. These treatments coat the delicate down clusters, making them much more resistant to moisture. For example, tests show that Nikwax’s Hydrophobic Down treatment enables it to absorb 70% less moisture and dry three times faster than untreated down. This makes modern down bags far more viable for UK trips, provided they are protected from a full soaking.
Despite this, for the most demanding and exposed situations, synthetic insulation still holds an edge. As the editors of Trek and Mountain magazine state with authority for UK conditions:
synthetic fills are still the undisputed bosses when it comes to camping in damp conditions, particularly bivvying in the UK
– Trek and Mountain, The Big Question: Should I get a down or synthetic sleeping bag?
The decision ultimately comes down to a trade-off based on your typical trip. For multi-day winter treks in the Cairngorms where drying gear is impossible, synthetic provides a critical safety margin. For a weekend car camping trip in the Peak District, the superior comfort and packability of a hydrophobic down bag is often the better choice.
This table helps clarify the performance trade-offs for typical UK scenarios:
| Criteria | Down (Hydrophobic) | Synthetic |
|---|---|---|
| Warmth-to-weight | Best in class, most compressible | Heavier for equivalent warmth |
| Wet performance | Resists light moisture, still fails if soaked | Retains structure and insulates even damp |
| Typical lifespan | Up to 10 years with good care | Around 3-4 years before loft loss |
| Best UK scenario | Car camping in the Peak District (can dry at home) | Multi-day winter trips in the Cairngorms |
The Storage Error That Destroys £400 Down Sleeping Bag Loft Permanently
A high-quality down sleeping bag is a significant investment, often costing hundreds of pounds. The key to its performance is « loft »—the ability of the down clusters to fluff up and trap air. The single most destructive thing you can do to this investment is to store it long-term in its small compression stuff sack. While perfect for saving space in your backpack, this constant compression slowly breaks the delicate down plumes, permanently reducing their ability to loft and, consequently, their insulating power.
When you return from a trip, your first priority should be to air out your sleeping bag to ensure it’s completely dry. Any lingering moisture from condensation or sweat can lead to mildew, which will ruin the down. Once bone dry, it must be stored uncompressed. Most premium bags come with a large mesh or cotton storage sack for this exact purpose. If you don’t have one, an old pillowcase or duvet cover works perfectly.
This simple act of proper storage is what preserves the bag’s performance and longevity. It is the primary reason why with proper care, a down bag’s lifespan can reach up to 10 years, whereas a synthetic bag, whose plastic fibres inevitably break down with repeated compression, typically lasts only 3-4 years. Treating your sleeping bag as a critical piece of your sleep system means caring for it not just on the trail, but also at home. Protecting its loft is protecting your ability to stay warm.
When Does Your Sleeping Mat’s R-Value Become More Critical Than Bag Temperature Rating?
The answer is: almost always, especially when the ground is cold. You can have an £800 expedition-grade sleeping bag, but if you lay it on the cold, frozen ground, you will be cold. This is because of conductive heat loss. While the loft of your sleeping bag protects you from heat loss to the air (convection), it gets compressed underneath your body, offering almost zero insulation. Your sleeping mat is the only thing stopping the ground from literally sucking the warmth out of your body.
The effectiveness of a mat at resisting this heat flow is measured by its R-value. The higher the R-value, the better it insulates. What most people don’t realise is that the official sleeping bag temperature ratings are based on a crucial, hidden assumption. The lab tests are conducted with the mannequin lying on a high-insulation surface; in fact, official EN/ISO sleeping bag testing assumes you are sleeping on a pad with an R-value of 5.5 or higher. If your mat has an R-value of 2.0, your entire sleep system will fail to meet the bag’s advertised comfort rating, no matter how good the bag is.
In the UK, matching your mat’s R-value to the season and ground temperature is non-negotiable for warmth.
| UK Season/Region | Ground Temp Range | Recommended R-Value |
|---|---|---|
| Summer | Above 10°C | 1.0-2.0 |
| Shoulder Seasons (Peak District) | Down to 5°C | 2.0-3.5 |
| Cold/Freezing conditions | Around 0°C | 4.0-5.0 |
| Winter (Snowdonia/Cairngorms) | Below -5°C | 5.0+ |
For winter camping on frozen ground, you need a system with a very high R-value. A popular and effective technique is to stack two mats, as their R-values are additive.
Action Plan: Stacking Mats for Winter Warmth
- Combine Mats: Pair a closed-cell foam pad (e.g., R-value 2.0) with an insulated air pad (e.g., R-value 4.0) to achieve a total system R-value of 6.0.
- Order of Placement: Place the durable closed-cell foam pad on the ground. This protects your more expensive air mat from punctures and acts as a moisture barrier.
- Maximise Comfort: Place the higher R-value, more comfortable insulated air pad on top, directly underneath your sleeping bag.
- Assess Conditions: Use this stacking technique specifically for cold-weather trips where ground temperatures are expected to be at or below freezing.
- Verify Total R-Value: Always check the manufacturer’s stated R-values for both pads and ensure their sum meets or exceeds the recommendation for the conditions you’ll face.
Why Do Autumn Hiking Boots Fail Catastrophically on Winter Snowshoe Trips?
The same « system failure » that causes a cold night’s sleep also applies to your feet. A standard three-season hiking boot, perfect for an autumn walk in the Lake District, can lead to misery and even danger on a winter snowshoeing trip in the Highlands for several systemic reasons. It’s a classic case of the right gear in the wrong environment.
First, there’s the issue of insulation and waterproofing. Your typical leather or fabric hiking boot (often rated B0) is designed to handle rain and puddles, but not constant, prolonged contact with snow. The snow melts against the boot, overwhelming the waterproof membrane, and the lack of dedicated insulation means your feet get wet and then dangerously cold. Winter boots (rated B1, B2, or B3) have a fully waterproof rand and integrated insulation to combat this.
Second is structural integrity. Snowshoe bindings wrap around the boot and exert significant flexing forces with every step. A flexible hiking boot isn’t built for this. The sole will bend in ways it wasn’t designed to, creating pressure points and blisters. More importantly, the upper material can be abraded or even torn by the binding straps. A stiffer winter boot provides the rigid platform needed to work efficiently with the snowshoe and resist these forces, making your movement more secure and less tiring.
Finally, a winter boot system includes a gaiter-compatible design and a thicker sole, keeping your feet higher off the cold snow. It’s not that the autumn boot « failed »; it’s that it was placed in a system where the demands—for insulation, waterproofing, and rigidity—far exceeded its design parameters, leading to a total breakdown in performance.
How to Select Between Bivvy Bags and Tarp Shelters for Scottish Mountain Bivouacs?
For the minimalist backpacker drawn to the raw beauty of a Scottish mountain bivouac, the choice between a bivvy bag and a tarp is a decision about how you interact with the environment. Both are key components of an ultralight sleep system, but they offer different balances of protection, space, and connection to the outdoors. The right choice depends on the weather, the location, and your personal tolerance for exposure.
A bivvy bag is the ultimate in minimalist shelter. It’s essentially a waterproof, breathable cocoon for your sleeping bag. Its primary advantage is its simplicity and tiny footprint. You can deploy it almost anywhere—on a narrow ledge, in a small hollow—offering excellent protection from wind and rain directly on your sleeping bag. However, it can feel restrictive, and managing condensation inside the bag is a constant challenge. Living and cooking in a bivvy bag during a prolonged downpour is a grim experience.
A tarp, by contrast, offers a far more liveable space. It provides a roof over your head, giving you room to sit up, cook, and organise your gear while being protected from rain. As the image above illustrates, a well-pitched tarp feels integrated into the landscape while providing crucial shelter. It offers superior ventilation, virtually eliminating condensation on your sleep system. The trade-off is that it’s more complex to pitch, requires suitable anchor points (trekking poles, rocks, or trees), and offers less protection from wind-driven rain or insects from the sides unless pitched low to the ground.
For a calm, clear night in the Cairngorms, a bivvy bag under the stars is magical. For a weekend of forecast showers, a tarp provides the psychological and practical comfort of a « camp. » Many experienced users combine both: sleeping in a bivvy bag under a tarp to get the best of both worlds—full waterproof protection and a dry living space.
Key takeaways
- A sleeping bag’s temperature rating is a lab-based guideline, not a real-world guarantee. Your personal metabolism and conditions matter more.
- True warmth comes from a « sleep system, » where the sleeping mat’s R-value is as crucial as the bag itself for preventing heat loss to the ground.
- For damp UK conditions, hydrophobic down is a viable, high-performance option, but synthetic insulation remains the safest choice for prolonged wet trips.
How to Plan Your First Multi-Night Camping Trip Without Gear Mistakes?
The principles we’ve applied to building a warm sleep system—thinking systematically, understanding environmental demands, and knowing how components interact—are the key to successful planning for any multi-night trip. The most common gear mistakes stem from evaluating items in isolation rather than as part of an integrated whole. A lightweight tent is useless if it can’t withstand the winds you’ll face; an efficient stove is worthless if you bring the wrong fuel canister.
The first step is to abandon the idea of « best » gear and embrace the concept of « appropriate » gear. Research the specific conditions of your planned route: What are the forecast temperatures, wind speeds, and precipitation? What is the nature of the terrain? This will define the performance demands on your entire system, from your shelter and sleep system to your clothing and footwear.
Create a checklist and lay everything out. Look for redundancies and gaps. Do your « waterproof » layers truly form a sealed system? Is the capacity of your backpack sufficient for your food and gear without being dangerously overloaded? Does the weight of one luxury item (like a heavy book) compromise your ability to carry an essential safety item (like a warmer jacket)? This holistic review process, treating your entire pack as a single, interconnected system, is the antidote to common mistakes. It moves you from simply owning gear to mastering it.
By applying this system-based thinking, you can move beyond frustrating gear failures and build the confidence to plan trips that are not just survivable, but genuinely comfortable and restorative. Start today by evaluating your own sleep system not by its price tag, but by how well its components work together to keep you warm.