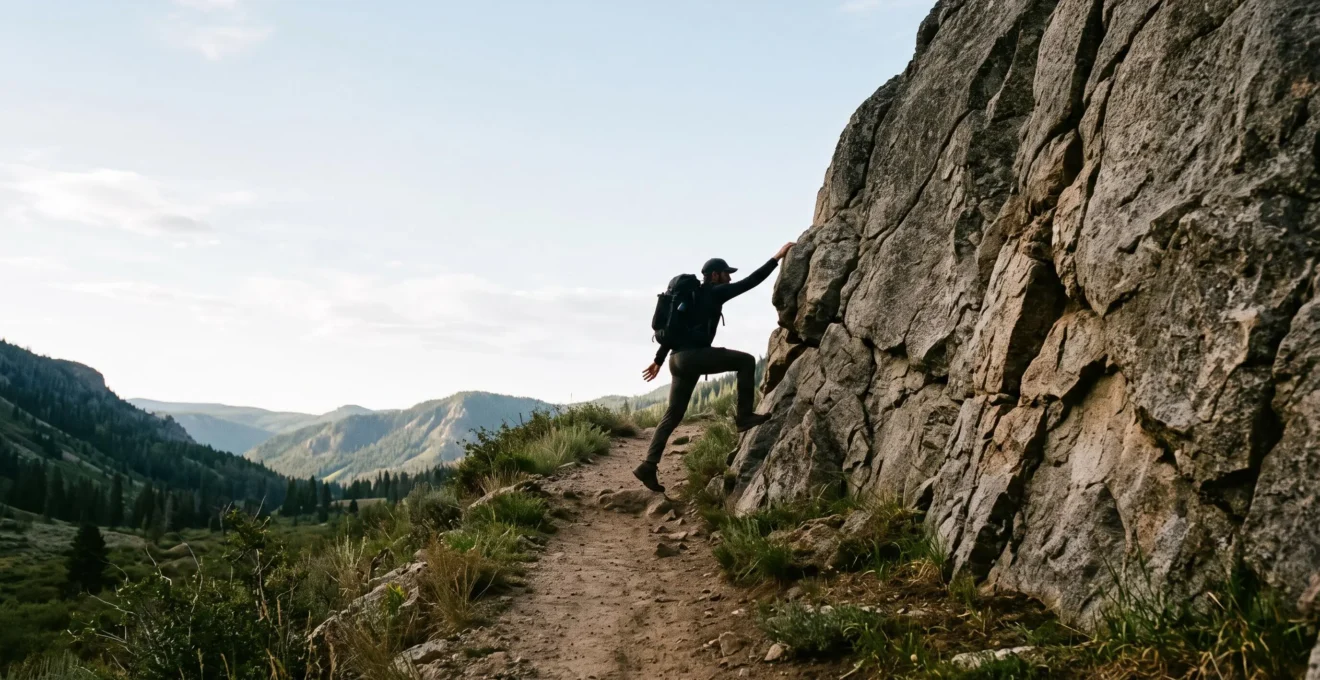
The line between hiking and scrambling isn’t just about using your hands; it’s a fundamental shift from walking *over* terrain to actively problem-solving your way *through* it.
- True scrambling begins when you must consciously assess the risk of every single hand and foot placement.
- The primary danger comes not from the difficulty, but from the increased consequence of a fall on steep, exposed ground.
- Safe progression involves building judgment on low-risk terrain before attempting committed and exposed mountain ridges.
Recommendation: To transition safely, focus first on developing a ‘vertical thinking’ mindset on escapable, Grade 1 scrambles, where the consequence of an error is minimal.
For any UK hillwalker, it’s a familiar moment. The well-trodden path dwindles, the grassy slope gives way to broken rock, and the angle steepens until your hands instinctively reach out to steady yourself. You’re no longer just walking. But what are you doing? Is this still hiking? Have you strayed into climbing? This moment of uncertainty marks the boundary zone of scrambling, a space where the rules of hillwalking begin to feel inadequate.
The common wisdom states that if you need to use your hands, you are scrambling. While simple, this definition misses the most crucial change that occurs. It fails to capture the fundamental pivot in mindset required to stay safe. A casual hand on a rock for balance is one thing; relying on that hand to support your body weight over a drop is another entirely. This is not just a physical adjustment; it’s a complete cognitive switch.
This guide isn’t another technical breakdown of grading systems. As a scrambling and rock skills instructor, my goal is to illuminate the internal shift that defines this transition. The true boundary is crossed when you move from an ‘autopilot’ hiking stride to a state of conscious movement problem-solving. It’s about learning to read the rock, assess the consequences of a slip with every move, and begin thinking vertically. Understanding this mental transition is the first and most important step toward navigating steeper mountain terrain with confidence and competence.
Throughout this article, we will explore the real reasons scrambling carries more risk, the specific techniques for secure movement, how to choose your first routes wisely, and how to recognise when the terrain demands more than just skill—it demands a rope. This framework is designed to build the most important muscle for any scrambler: your judgment.
Summary: When Does Hiking End and Scrambling Begin? A Guide to the Crucial Mindset Shift
- Why Does Scrambling Terrain Carry 10x the Injury Risk of Steep Hiking?
- How to Maintain Safe Hand and Foot Placement on Grade 2 Scrambling Routes?
- Escapable Scrambles vs Committed Ridges: Which Should First-Timers Attempt?
- The Scrambling Error That Makes Wet Rock 5x More Dangerous for Beginners
- When Does a Scrambling Route Become Dangerous Enough to Require a Rope?
- Why Do 80% of Self-Taught Climbers Have Dangerous Anchor-Building Errors?
- The Mountain Hiking Mistake That Causes 50% of Ankle Injuries on Scree Slopes
- How to Learn Rock Climbing Skills for Ascending Technical Mountain Routes?
Why Does Scrambling Terrain Carry 10x the Injury Risk of Steep Hiking?
The significantly higher risk in scrambling isn’t because the movement is inherently more difficult, but because the consequences of a mistake are exponentially greater. On a steep hiking path, a trip might result in a sprained ankle or a grazed knee. On scrambling terrain, a slip can lead to a fall from height, where the outcome is far more severe. This distinction is not trivial; it is the absolute core of the scrambling mindset. You are no longer just managing your balance; you are managing a potential fall.
The data on alpine accidents paints a stark picture. Gravity is unforgiving. For instance, a prospective analysis from the International Alpine Trauma Registry found that the mean fall height in mountain incidents was over 31 meters. This single statistic reframes the risk: it’s not about the likelihood of slipping, but the severity of the outcome if you do. Your brain must shift from thinking « don’t trip » to « do not fall. » This requires a constant, active process of consequence assessment for every move you make.
This mental load is taxing, and its erosion through fatigue is a major contributing factor to accidents. A fascinating study of hiking accidents in the Austrian Alps illustrates this perfectly. It found that men were more likely to have accidents during the ascent, while women were significantly more likely to be injured during the descent. This pattern highlights how accumulated fatigue and a decline in vigilant decision-making over the course of a day dramatically increase risk. The danger isn’t static; it grows as your mental and physical energy wanes, making the second half of any scramble the most critical period for maintaining focus.
How to Maintain Safe Hand and Foot Placement on Grade 2 Scrambling Routes?
Once you accept the heightened consequences, your focus must turn to technique. Safe scrambling movement is not intuitive; it is a learned skill built on a foundation of conscious placement. Unlike the rhythmic, almost unconscious stride of hiking, every point of contact with the rock in scrambling must be a deliberate and tested choice. This is where you begin to think and move like a climber, engaging in a physical dialogue with the terrain.
Your goal is to maintain maximum stability and balance at all times. This is achieved by adhering to a set of core principles that govern efficient movement over steep rock. These techniques are designed to keep your centre of gravity controlled and reduce the strain on your arms, which are much weaker than your legs. Mastering them turns a daunting rock face into a solvable puzzle.
As this image shows, the connection with the rock is tactile and precise. You should feel the texture of the hold and its angle, confirming its stability before committing your weight. This methodical approach is your primary safety system. The fundamental techniques for this include:
- Always maintain three points of contact: Before moving a hand or foot, ensure the other three are on solid, stable holds. This could be two feet and one hand, or two hands and one foot.
- Keep your centre of gravity close to the rock: Lean in with your hips. This improves balance, puts more weight onto your powerful leg muscles, and reduces the tiring strain on your arms.
- Stay constantly aware of your body position: Think about how your body is positioned relative to the holds. Sometimes a small shift of the hips or a higher foot placement can unlock a move.
- Look ahead and plan your moves: Scan the rock above you to plan your next two or three moves in advance. This leads to smoother, more efficient, and less tiring movement.
- Test every hold: Before committing your full body weight, give every hand and foot hold a firm tap or pull. If it moves or sounds hollow, do not use it.
Escapable Scrambles vs Committed Ridges: Which Should First-Timers Attempt?
Not all scrambles are created equal. The most important distinction for a beginner is not the technical grade, but the level of commitment the route demands. This is the difference between an escapable scramble and a committed ridge. An escapable scramble offers easy ways off the difficult terrain—a grassy slope to the side, for example. If you feel uncomfortable, get tired, or the weather turns, you can simply retreat to easier ground. This is a low-consequence environment, perfect for learning.
A committed ridge, however, is a different proposition. Once you are on it, the easiest way forward is often to continue to the end. The sides may be sheer cliffs, making retreat difficult or impossible without a rope. This is a high-consequence environment where solid skills and good judgment are non-negotiable. For a first-timer, the choice is clear: build your skills and, more importantly, your judgment on escapable terrain.
The exposure and scale of a committed ridge, as seen here, leave no room for error. The psychological pressure of knowing you cannot easily retreat can impact decision-making. Therefore, a structured progression is key to building the confidence and competence needed for such terrain. Your goal should be to make skills like route-finding and precise footwork instinctive in a safe setting before you test them where the stakes are high.
Action Plan: Building Scrambling Skills Through Guided Progression
- Practice route-finding on low-risk ground: Before attempting a named scramble, practice picking a line up a low-angle boulder field or a short, broken buttress where you can easily walk back down.
- Learn to read terrain features: Use a map and visual inspection to identify stable ridges versus loose, chossy gullies. Actively choose the safer line even on easy ground.
- Train movement on varied rock: Deliberately practice precise hand and foot placements on steep slabs and test your balance on talus fields in a low-consequence setting.
- Build mental resilience: When a foothold shifts unexpectedly, practice staying calm, reassessing, and finding a new route. This trains your mind to respond constructively to adversity.
- Formalise your learning: Use guided trips or structured courses with a qualified instructor. Repetition under expert supervision is the fastest way to turn conscious skills into reliable instinct.
The Scrambling Error That Makes Wet Rock 5x More Dangerous for Beginners
Every UK hillwalker knows that conditions can change in an instant. A sunny, grippy rock face can become a slick, treacherous surface in minutes. The single biggest error a beginner can make is failing to fundamentally change their technique and risk assessment when the rock gets wet. Many assume it’s just a bit more slippery; the reality is that water transforms the physics of the interaction between your boots and the rock, making a fall significantly more likely.
The problem is friction, or rather, the lack of it. Rubber-soled boots work by creating a high-friction bond with the micro-texture of the rock. When water is introduced, this bond is compromised. As the editorial team at Advnture magazine succinctly explains in an article on climbing technique, the science is simple:
Water acts as a lubricant and reduces the force of friction between two surfaces.
– Advnture Editorial Team, What is smearing in climbing? We get to grips with the technique
This ‘lubricant’ effect means that holds you trusted completely when dry may now fail under much less force. Your foot could skate off a sloping foothold, or your hand could slip from a polished jug. The error is not adapting to this new reality. You must slow down, become even more deliberate in your conscious placement, and shift your weight with extreme care. Your movements should become smaller and more precise, and you should actively seek out rougher, more featured rock that offers better mechanical grip. Ignoring this change in physics is gambling against a stacked deck.
When Does a Scrambling Route Become Dangerous Enough to Require a Rope?
The upper limit of scrambling blurs into the lower grades of rock climbing. There is no universally agreed-upon line, but the question of when to use a rope is one of the most critical judgments a scrambler can make. While terrain difficulty (Grade 3 scrambles or beyond) is a factor, the real trigger for needing a rope is often far more subtle and rooted in human factors: fatigue, time pressure, deteriorating weather, or a loss of confidence.
A rope is a safety system designed to catch a fall. Therefore, you need one when a fall becomes either more likely or its consequences become unacceptable. Experienced climbers fall, and according to the annual Accidents in North American Climbing report, there can be over 200 accidents and injuries reported in a single year. This highlights that even with skill, the risk is real. The decision to carry and use a rope is an admission that you are entering a zone where a simple mistake could be fatal and you require a backup.
Case Study: Human Factors and the Need for a Rope
Two case studies from the American Alpine Club highlight how human factors, not just terrain, dictate the need for a safety system. In one case, an experienced sport climber, despite hundreds of prior rappels, loaded his device incorrectly and fell after skipping a final safety check due to complacency. In a second, an experienced guide, rushing to finish a route before a long drive home, clipped a knot incorrectly, nearly resulting in a ground fall. Both incidents occurred on terrain they were technically capable of managing. The real trigger for the near-fatal errors was fatigue, time pressure, and overconfidence. These cases powerfully illustrate that the decision to use a rope should be based on an honest assessment of your mental and physical state, not just the grade of the rock.
Ultimately, the rule is this: if you or anyone in your party feels that a slip would be catastrophic and you are not 100% confident in your ability to move securely, it’s time for a rope. This is not a sign of weakness; it is a sign of mature consequence assessment and good judgment. Carrying the rope, however, is only half the battle; knowing how to use it correctly is a different skill set altogether.
Why Do 80% of Self-Taught Climbers Have Dangerous Anchor-Building Errors?
Using a rope for safety introduces a new and complex set of skills, with anchor building being the most critical. An anchor is your lifeline, the system that connects you to the mountain. A common and dangerous misconception is that this is an easy skill to self-teach. The reality is that building safe, reliable anchors in variable mountain terrain is a subtle art and science. Errors are common and often invisible to the untrained eye, which is why formal instruction is so essential.
It’s tempting to believe that accidents only happen to novices, but when it comes to complex systems like anchors, this is dangerously false. In fact, historical American Alpine Club historical accident data shows that 43% of recorded climbing accidents involve experienced climbers. This demonstrates that experience alone does not eliminate risk; complacency and subtle gaps in knowledge can lead to catastrophic failure. An experienced scrambler may be confident in their movement but a complete novice in anchor dynamics.
Case Study: The Compounding of Errors in Anchor Failure
A classic case study details a party of four rappelling from North Early Winters Spire in Washington. Facing deteriorating weather after twelve hours on the move, they made a series of compounding errors. They chose to trust a single, moderately rusted piton for their rappel anchor. All four climbers then clipped into this single point of failure using just two slings, creating poor load distribution. The incident is a textbook example of how small, seemingly minor mistakes—driven by time pressure and fatigue—can stack up. It wasn’t one dramatic error, but a cascade of poor judgments in geometry, material assessment, and risk management that led to a high-potential incident. This underscores that anchor security is a system, and every part of it must be understood and correctly applied.
The principles of a sound anchor—that it be Solid, Redundant, Equalized, and have No Extension (SERENE/ERNEST)—are easy to memorise but require extensive practice under expert guidance to apply correctly in the real world. A self-taught climber often learns one or two « textbook » setups without understanding the underlying principles, leaving them unable to adapt safely to non-textbook situations, which are the norm in the mountains.
The Mountain Hiking Mistake That Causes 50% of Ankle Injuries on Scree Slopes
While much of the focus in scrambling is on solid rock, a huge amount of time is spent on loose terrain like scree and talus, particularly on descents. These shifting slopes are a common site for injuries, with twisted or broken ankles being a frequent outcome. The most common mistake hikers and scramblers make is treating this ground like a solid path, moving too quickly and without the necessary conscious placement of their feet. Every single step on loose ground is a test of stability.
Scree (small, gravel-like stones) and talus (larger, interlocking blocks) are often spoken of interchangeably, but they behave very differently and present distinct risks. Understanding the difference is key to adapting your technique and avoiding injury. Scree slides underfoot, demanding a controlled ‘boot-skiing’ technique, while talus blocks can shift or roll, creating traps for ankles and legs. A disciplined, methodical approach is required for both.
The following table, based on common mountain safety advice like that found in an analysis of scree and talus hiking, breaks down the key differences:
| Characteristic | Scree | Talus |
|---|---|---|
| Particle size | Small, loose fragments | Large, interlocking blocks |
| Typical movement technique | Controlled plunge-stepping or ‘boot-skiing’ | Careful boulder-hopping from block to block |
| Primary injury risk | Sliding falls and loss of balance | Ankle trapping and twisting between shifting blocks |
| Recommended approach | Small, deliberate steps with poles for balance | Test each block’s stability before committing full weight |
To navigate this terrain safely, you must adopt a micro-testing protocol for every footstep. Instead of committing your full weight at once, you apply pressure gradually, feeling for any shift in the rock beneath you. This protocol turns every step into a deliberate, two-stage action:
- Place and test: Place your foot and apply about 20 percent of your weight, feeling for any movement before committing.
- Unload or commit: If the rock shifts, immediately unload your foot and choose a new placement. If it’s stable, smoothly transfer your weight.
- Use flat feet: Prefer flat-foot placements over landing on your toes to spread pressure more evenly across the rock surface.
- Match the angle: Try to match the angle of your boot sole to the angle of the rock you’re stepping on for maximum friction.
- Avoid ‘teeter points’: Be wary of stepping on the crest of a rounded or pointed block, which can easily tip or roll.
Key takeaways
- The true mark of scrambling is not simply using your hands, but the mental shift to ‘movement problem-solving’ on terrain with high consequences.
- Safe movement is built on the principle of maintaining three points of contact and deliberately testing every hand and foot hold before committing your weight.
- Build your skills and judgment progressively on escapable scrambles before attempting committed and exposed ridges where retreat is not a simple option.
How to Learn Rock Climbing Skills for Ascending Technical Mountain Routes?
As your ambitions grow from hiking and scrambling towards more technical mountain terrain, the need for formal rock climbing skills becomes undeniable. Many people start this journey in a climbing gym, which is an excellent place to build physical strength and basic movement skills. However, the crucial error is assuming that gym proficiency translates directly to outdoor safety. The gap between pulling on colourful plastic holds and building your own safety system on a remote mountain crag is immense.
The indoor environment is controlled and sanitised. Outdoors, you are the one responsible for everything. The journey to becoming a competent mountain climber is about closing this skills gap methodically and with humility. It involves learning to read natural rock, protect yourself from rockfall, build your own anchors, and make complex decisions far from help. This is a craft best learned through apprenticeship, not just from a textbook or a weekend course.
- Recognize the gym’s limitations: In a gym, the anchors are professionally installed and routes are regularly inspected. Outdoors, this entire safety net is absent. You are building the system from scratch.
- Understand your responsibility: When you lead a climb outdoors, you are entirely responsible for the safety of yourself and your partner. This requires a deep understanding of gear, rock quality, and anchor principles.
- Seek an experienced mentor: The best way to learn is from a qualified guide or a deeply experienced partner who has built these systems hundreds of times. They can spot subtle errors before they compound into a disaster.
- Focus on systems, not just summits: On a guided or mentored day, your primary goal should be to learn how to move efficiently and build safe systems, not just to « bag » the peak.
Case Study: The Illusion of Competence
A new climber, eager to get outside, put his trust in a partner who was also fairly new but had taken a formal anchor-building class. When the anchor they built failed, the new climber was helpless. The incident underscores a critical lesson: having taken a class is not the same as possessing the seasoned judgment of a true mentor. The partner may have been able to replicate a textbook anchor but lacked the experience to identify why that setup was inappropriate for that specific rock. This reinforces the immense value of learning from a teacher with a deep well of experience, rather than simply the most confident person in your group.
Transitioning from hillwalking to scrambling and beyond is a rewarding journey that opens up incredible new terrain. The key is to approach it with respect, patience, and a commitment to learning. If you feel ready to take the next step, the most effective way to build both skill and confidence is to seek professional instruction from a certified guide or instructor.