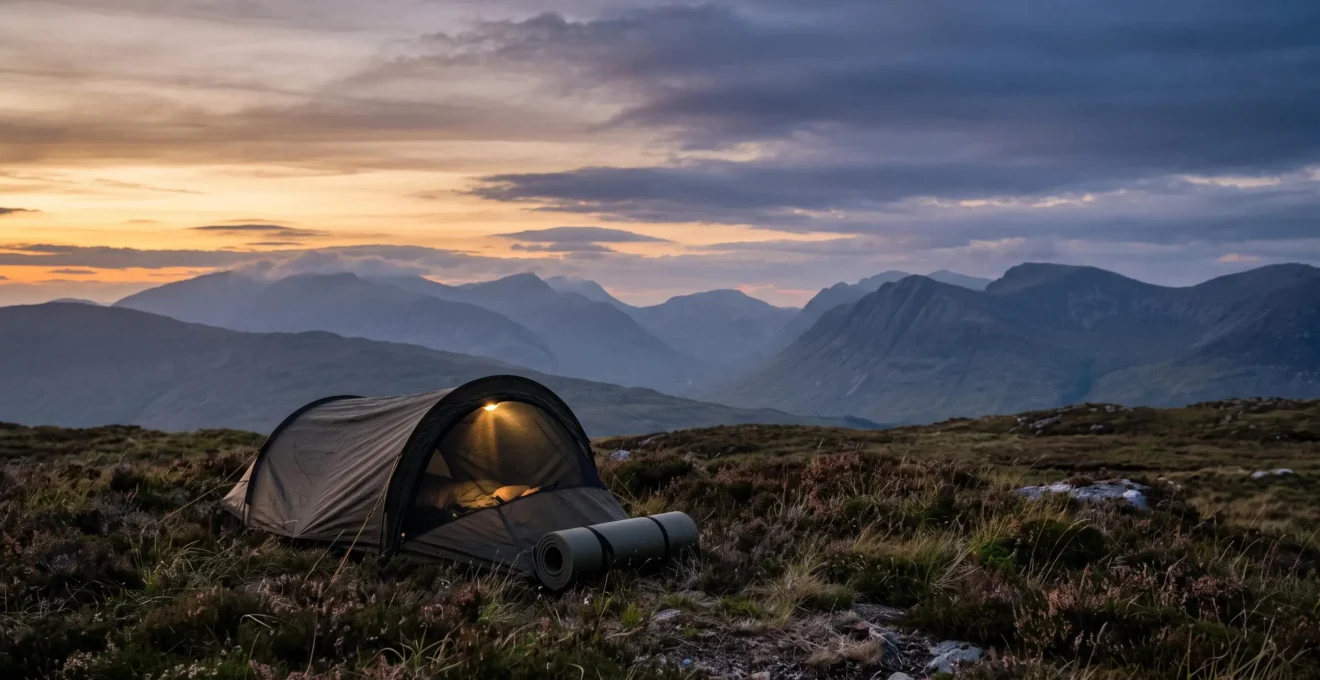
Many assume bivouacking is just tent camping without the comfort. The reality is that it’s an entirely separate skill. Success isn’t about enduring the elements, but reading the landscape to choose a micro-site that works with nature, not against it. This guide shifts your mindset from seeking shelter to practicing immersion, equipping you with the minimalist skills to sleep out safely and responsibly in the UK’s wild areas.
The desire for a deeper connection with the wild is a powerful pull. For the experienced tent camper, the fabric walls that once offered comfort can start to feel like a barrier. You hear the call of the owls, feel the change in the wind, but you don’t truly see the stars. The bivouac—a minimalist overnight stay with just a waterproof bag for shelter—promises that raw, unfiltered immersion. Yet, for the first-timer, this promise is often overshadowed by the fear of being cold, wet, and exposed.
Most advice focuses on familiar tent-camping platitudes: check the weather, pack the right gear, follow Leave No Trace. While true, these generalisations fail to address the fundamental shift required. They miss the crucial point that a bivvy bag is not a smaller tent; it’s part of a system that relies more on your brain than your bag. The skills that make you a competent tent camper only partially transfer to a successful bivouac.
But what if the key wasn’t simply to endure the elements, but to understand and avoid them through intelligent practice? This guide is built on the minimalist philosophy of a mountaineering instructor: true safety and comfort in the wild come from knowledge, not just equipment. We will deconstruct the skills you need, moving beyond generic advice to focus on the specific arts of site selection, shelter system management, and risk assessment essential for the UK’s unique and challenging environment.
This article provides a structured approach to your first safe and successful bivouac. We’ll explore the critical differences between tent and bivvy skills, guide your gear choices, and provide frameworks for site selection and ethical practice, ensuring you become part of the landscape, not just a visitor passing through.
Summary: How to Bivouac Safely in UK Wild Camping Areas for the First Time?
- Why Do Tent Camping Skills Transfer Only 40% to Successful Bivouac Practice?
- How to Select Between Bivvy Bags and Tarp Shelters for Scottish Mountain Bivouacs?
- Planned Overnight Bivouac vs Emergency Survival Practice: Which Builds Better Wilderness Skills?
- The Bivouac Site Error That Causes Flash Flooding or Hypothermic Cold Air Pooling
- When Should You Cancel a Planned Bivouac Due to Wind or Rain Warnings?
- Lightweight 1.5 kg Tent vs Robust 5 kg Shelter: Which for Mountain Camping?
- How to Manage Toilet Needs on Multi-Day Hikes Without Contaminating Water Sources?
- How to Practice Leave No Trace Principles on UK Hiking and Camping Trips?
Why Do Tent Camping Skills Transfer Only 40% to Successful Bivouac Practice?
The assumption that tent camping proficiency translates directly to bivouacking is a common and dangerous one. Your tent-based experience—what we might call the 40%—covers fundamental outdoor knowledge: map reading, general weather awareness, and basic camp craft. However, the remaining 60% represents a crucial psychological and environmental shift. A tent is a room you erect in the wilderness, a portable piece of architecture that creates a barrier. A bivouac is an act of immersion, where you become a temporary feature of the landscape itself.
This is the core difference: tent camping is a mechanical skill of assembly, while bivouacking is an environmental skill of interpretation. As Mountaineering Scotland notes, a windy hillside is the wrong place to learn to pitch a new tent, highlighting the importance of practicing a physical process. Yet, with a bivvy, the primary skill isn’t deployment—which is incredibly fast—it’s the intellectual process of choosing where to deploy. An experienced user notes they have friends who « swear by their winter bivy sacks because they’re so fast to deploy compared to a tent or tarp. » This speed frees up mental energy to focus on what truly matters: reading the ground.
The image below contrasts the enclosed, sheltered feeling of a tent with the open, immersive nature of a bivouac. This isn’t just an aesthetic difference; it’s the heart of the challenge and the reward.
The tent-camper asks, « Where can I fit my tent? » The bivouacker must ask, « Where will the cold air settle? Where will rainwater run? Where am I sheltered from the wind, yet out of a trap? » This transition from seeking a flat space to reading the subtle language of the land is the 60% of the skill that must be learned. It is a move from finding a location to understanding a micro-environment.
How to Select Between Bivvy Bags and Tarp Shelters for Scottish Mountain Bivouacs?
Your shelter is not a single item but a system. For the variable conditions of Scottish mountains, the choice between a solo bivvy bag and a bivvy/tarp combination is a critical one, balancing weight, skill, and weather protection. A bivvy bag alone offers superb, fast-deploying protection from wind and rain but at the cost of internal space and significant condensation management. A tarp alone is wonderfully adaptable and open but requires more skill to pitch effectively and offers limited protection in a swirling storm or during midge season.
For this reason, many experienced hands arrive at a hybrid solution. As one contributor to Exploration Journal puts it, « In my experience the best all round combination is carrying a tarp and bivvy bag. » This system provides the bombproof waterproofing of the bivvy for your sleeping bag, plus a dry « admin » area under the tarp for cooking, packing, and psychological comfort in prolonged rain. While it adds weight compared to a single item, a tarp-and-bivy combination typically weighs between 500-900g, often still lighter than the lightest two-skin tents.
The following table, based on advice for wild campers on Scottish hills, breaks down the practical differences. The ‘Skill Floor’ indicates how much practice is needed to use the system effectively and safely.
| Shelter Type | Skill Floor | Weather Protection | Best Scottish Use Case |
|---|---|---|---|
| Bivvy Bag alone | Low (quick to deploy) | Excellent wind/rain blocking, but cramped and prone to condensation | Solo, minimal-weight trips with unpredictable weather and little time to pitch |
| Tarp alone | Higher (requires pitching skill) | Adaptable but limited in serious storms or midge season | Sheltered ground, fine weather, flexibility for cooking/drying kit |
| Hooped Bivvy + Tarp (Hybrid) | Moderate | Near all-round protection with a dry admin area | Four-season Scottish mountain use, variable wind and midge conditions |
Ultimately, the choice depends on the trip and your risk tolerance. For a first-timer aiming to build confidence in the UK’s challenging climate, the hybrid system offers the greatest margin of safety and comfort. It allows you to experience the immersion of a bivouac with the added security of a protected living space, a crucial advantage when the weather turns.
Planned Overnight Bivouac vs Emergency Survival Practice: Which Builds Better Wilderness Skills?
There’s a critical distinction between a planned, intentional bivouac and an unplanned, emergency one. While both involve sleeping out without a tent, their contribution to your skillset is vastly different. Relying on an emergency bivvy bag pulled out in desperation teaches you one thing: survival. A planned bivouac, however, teaches you the proactive art of thriving in the wilderness. It’s the difference between reacting to a crisis and preventing one from ever occurring.
Many responsible hillwalkers carry an emergency shelter as standard. As one Scottish mountaineer states on a forum, « as a minimum I’d take the AMK emergency bivvy… there are few routes in Scotland that I would be tackling with a rucsac where weight is that critical. » This is a survival tool, a last resort. Skill development happens not in the panicked deployment of this tool, but in the calm, deliberate practice of sleeping out in fair weather. This is where you learn to read the ground, manage your temperature, and test your system without the life-or-death pressure.
The real danger in the UK hills is often misunderstood. It’s not always the deep freeze of winter that poses the greatest threat. As mountain first aid expert Helen Howe warns, « The risk of hypothermia in icy weather is not necessarily greater than from milder temperatures combined with wind and rain – typical conditions this season. » A planned bivouac allows you to build a deep, intuitive understanding of how these elements interact with your body and your gear. You learn to anticipate the cold spot, the damp ground, the wind channel, and to select a site that mitigates these risks from the outset.
In short, emergency practice builds resilience to suffering. Planned practice builds the wisdom to avoid suffering altogether. By choosing a good forecast for your first few trips, you are not cheating; you are creating the optimal learning environment. You are building the foundational skills of site selection and system management that will keep you safe when a forecast inevitably proves wrong.
The Bivouac Site Error That Causes Flash Flooding or Hypothermic Cold Air Pooling
The single most important bivouacking skill is not choosing your gear, but choosing your 2×2 metres of ground for the night. A tent’s waterproof floor offers a small buffer against a poor site choice; a bivvy bag offers none. The most common and dangerous beginner mistake is selecting a site based on what looks good at dusk, rather than what physics dictates will happen after dark. This often leads to sleeping in a ‘trap’ for either water or, more insidiously, cold air.
The most tempting spots—flat, grassy, and sheltered from the wind—are often shallow depressions or hollows. At night, a phenomenon known as katabatic drainage occurs: cold, dense air flows downhill like water, pooling in the lowest points. Sleeping in one of these ‘cold sinks’ can leave you shivering in a pocket of air several degrees colder than the open ground just metres away, even on a clear, still night. As the Munros.app team points out, mountain weather is a world of its own: « A summit can be 15°C colder than the glen, winds can double with every 300m of altitude gained, and cloud can roll in so fast you lose visibility in minutes. » Your site choice must account for these micro-climatic effects.
Learning to read the ground is key. Look for clues: lusher, greener grass often indicates a damp area or drainage line. Faint mist beginning to form in a hollow at twilight is a clear visual sign of cold air pooling. The ideal site is often counter-intuitive: a small, almost imperceptible rise, just slightly above the surrounding terrain. This allows cold air and any potential surface water to drain away from you.
This image perfectly illustrates the kind of subtle terrain feature to be wary of. The slightly darker, lusher grass indicates a spot that holds more moisture and will likely be a conduit for cold air after sunset. Avoid these natural traps. Your goal is to find a durable surface on a slight rise, even if it feels marginally more exposed to a gentle breeze. That breeze is a sign that cold air is moving, not stagnating around you.
When Should You Cancel a Planned Bivouac Due to Wind or Rain Warnings?
The decision to « go » or « no-go » is a hallmark of an experienced mountaineer. For a bivouacker, this decision is even more critical, as you are your own shelter. While a bit of rain can be managed, high winds transform the environment and dramatically increase risk. You must learn to interpret weather forecasts not just for rain or shine, but for their physical impact on you.
The Mountain Weather Information Service (MWIS) is an essential tool for any UK hill-goer. Their forecasts include specific details on wind speed and its likely effect on a person. For a planned, non-emergency bivouac, any forecast predicting winds consistently above 25-30mph should trigger a reassessment or cancellation. At these speeds, the wind is not just an inconvenience; it’s a force that saps energy, affects balance, and makes every task difficult. The British Mountaineering Council rightly warns that « Even moderate winds can drastically lower the temperature you feel, known as the ‘wind chill factor,’ increasing the risk of hypothermia. »
This isn’t a subjective feeling. It’s a quantifiable threat. For example, a study shows that even moderate winds of 15 mph can reduce the effective temperature by up to 10°C. This means a relatively mild 5°C night can feel like a dangerously cold -5°C. Without the protection of tent walls, your sleep system and site selection have to work much harder to combat this constant theft of heat. The table below, adapted from MWIS descriptors, provides a clear framework for your go/no-go decision.
| Wind Speed | MWIS Descriptor | Effect on You |
|---|---|---|
| 10-15mph or less | Noticeable breeze | Feeling cool where exposed on tops; unlikely to affect walking progress |
| 15-25mph | Blustery conditions | Buffeting on higher terrain, may affect balance on exposed ridges |
| 25-40mph | Considerable buffeting | Walking into the wind will be strenuous on exposed terrain |
| 40-55mph | Severe conditions | Any movement very challenging, you may be blown over |
For a first-timer, the goal is to practice skills, not to endure a storm. Be conservative. If the forecast predicts « considerable buffeting, » consider a more sheltered, low-level location or postpone the trip. There is no shame in cancelling; it is the wisest choice a mountaineer can make. The mountains will be there next weekend.
Lightweight 1.5 kg Tent vs Robust 5 kg Shelter: Which for Mountain Camping?
The debate between lightweight and robust is often framed as a simple trade-off: carry less and be less protected, or carry more and be safer. This is a false dichotomy. For the bivouacker, the philosophy is different: robustness comes from skill and intelligent system design, not sheer weight. A 1kg bivvy-and-tarp system in the hands of someone who understands site selection is infinitely more ‘robust’ than a 5kg geodesic tent pitched in a cold sink.
The goal of minimalism is not to suffer, but to carry only what is essential and make it work harder. Your bivvy system—comprising your sleeping bag, sleeping mat, and the bivvy bag itself—is a perfect example. The bivvy bag’s primary role is to keep wind and water off your sleeping bag, preserving its insulation. Your sleeping mat’s role is to insulate you from the cold, hard ground. These components work together, and their effectiveness can be dramatically enhanced with knowledge.
One expert-level technique for extending your system’s performance is the use of a Vapour Barrier Liner (VBL). This is an ultralight, non-breathable sack placed inside your sleeping bag. It stops your body’s perspiration from entering the sleeping bag’s insulation, preventing it from becoming damp and losing its loft (and warmth) over a multi-day trip. While it can feel clammy, research on winter camping sleep systems shows that using a vapor barrier liner permits comfortable sleeping in temperatures 10-15°F (roughly 5-8°C) colder than without one. This is a clear example of adding a few grams of gear to gain a huge performance boost—the minimalist ethos in action.
Instead of thinking in terms of a single ‘robust’ shelter, think in terms of an adaptable, multi-component system. As noted by Trekitt’s experts, « Many experienced bivvy campers combine a bivvy bag with a lightweight tarp. This setup provides additional weather protection while still keeping weight low. » This layered approach—VBL, sleeping bag, bivvy, tarp—is the epitome of mountain robustness. It is lightweight, flexible, and allows you to adapt to the conditions in front of you, rather than carrying a heavy, one-size-fits-all solution.
How to Manage Toilet Needs on Multi-Day Hikes Without Contaminating Water Sources?
The practice of minimalist camping is an exercise in responsibility. Nowhere is this more acute than in managing human waste. It’s the least glamorous skill, but arguably the most important for protecting the wild places we love. As the team at OutdoorSCOT bluntly states, « Every wild camping guide tells you to ‘leave no trace.’ What they don’t tell you is that the biggest trace problem in Scotland isn’t campfires or litter — it’s human waste. »
A high concentration of campers in popular areas, even if they are individually responsible in other ways, can lead to serious environmental and health issues if waste is not handled correctly. The key principles are to keep it away from water, away from paths, and to ensure it decomposes as quickly as possible. This requires more than just a quick kick of moss over the top.
The use of a lightweight camping trowel is non-negotiable. It is as essential a piece of kit as your headtorch or water filter. The process is simple but must be followed diligently to be effective. Burying solid waste in a ‘cathole’ is the accepted method in most UK upland areas, but it must be done correctly.
Your Action Plan: Responsible Waste Disposal
- Select a spot: Before the need is urgent, choose a location at least 30 metres (around 40 adult paces) from any water source (rivers, lochs, streams), paths, or your campsite.
- Dig the hole: Use a dedicated trowel to dig a hole 15-20cm (6-8 inches) deep. This places the waste into the topsoil layer where bacteria can break it down effectively.
- Bury waste: Do what you need to do in the hole. Once finished, fill the hole back in with the excavated soil and disguise it with leaf litter or a stone.
- Pack out paper: Do not bury toilet paper or wet wipes. They decompose incredibly slowly and are often dug up by animals. Place all used paper in a dedicated, sealed bag (a zip-top bag covered in duct tape works well) and pack it out with you.
- Pack out everything: In fragile alpine environments, very rocky ground, or sensitive ecosystems where digging is not practical, you must be prepared to pack out all solid waste using a commercial WAG bag or similar portable toilet system.
This isn’t just about following rules; it’s about respect. It’s about ensuring that the next person to walk through that beautiful glen has the same pristine experience you did. It is the practical application of the Leave No Trace ethic.
Key takeaways
- Bivouacking is a skill of environmental reading, not just gear endurance.
- Site selection is your primary shelter; a hollow is a trap for cold air and water.
- In the UK, wind and wet are bigger threats than cold alone; a tarp/bivvy system offers the most adaptable protection.
How to Practice Leave No Trace Principles on UK Hiking and Camping Trips?
The freedom to wild camp, particularly under the Scottish Outdoor Access Code, is a privilege, not a right. It is built on the foundation of responsible use, encapsulated by the seven principles of Leave No Trace (LNT). For the minimalist bivouacker, whose goal is to blend into the landscape, these principles are not just rules but the very philosophy of the pursuit. To practice LNT is to aim to be a ghost in the landscape—to pass through, leaving it unchanged by your presence.
The core tenet is simple, as stated by Wilderness Scotland: « ‘If You Bring It In, Take It Out’ – take home all litter and leftover food (including tea bags, fruit peels and other biodegradable foods). » Food scraps attract animals and take much longer to disappear than you think. Your pack should be slightly heavier on the way out, carrying your rubbish and perhaps any you find along the way.
For a bivouac, the LNT principles of ‘Camp on Durable Surfaces’ and ‘Dispose of Waste Properly’ are paramount. Your site choice should favour hard-wearing ground like dry grass, sand, or gravel, avoiding delicate mosses and boggy areas. After your stay, the spot should look exactly as it did when you arrived. This means no fire rings, no flattened vegetation, and no lingering signs of your stay. The rule on waste disposal is absolute; guidance for areas like the Cairngorms requires you to be at least 30 metres minimum from any water source for toileting, a critical buffer to protect pristine ecosystems.
The LNT ethos for bivouacking can be summarised as being small, quiet, and temporary. Camp alone or in a very small group. Stay for one or two nights at most. Pitch late and leave early. By minimising your « footprint » in both a literal and metaphorical sense, you protect the environment and preserve the sense of wildness for others. This is the ultimate expression of skill and respect for the outdoors.
Your journey into bivouacking is a step towards a more profound connection with the wild. By embracing the mindset of an instructor—focusing on skill, knowledge, and responsibility over mere equipment—you transform a potentially intimidating experience into a deeply rewarding practice. The next step is to take these principles and apply them. Start small, choose a good weather window, and begin building your own book of ground-truth and experience.