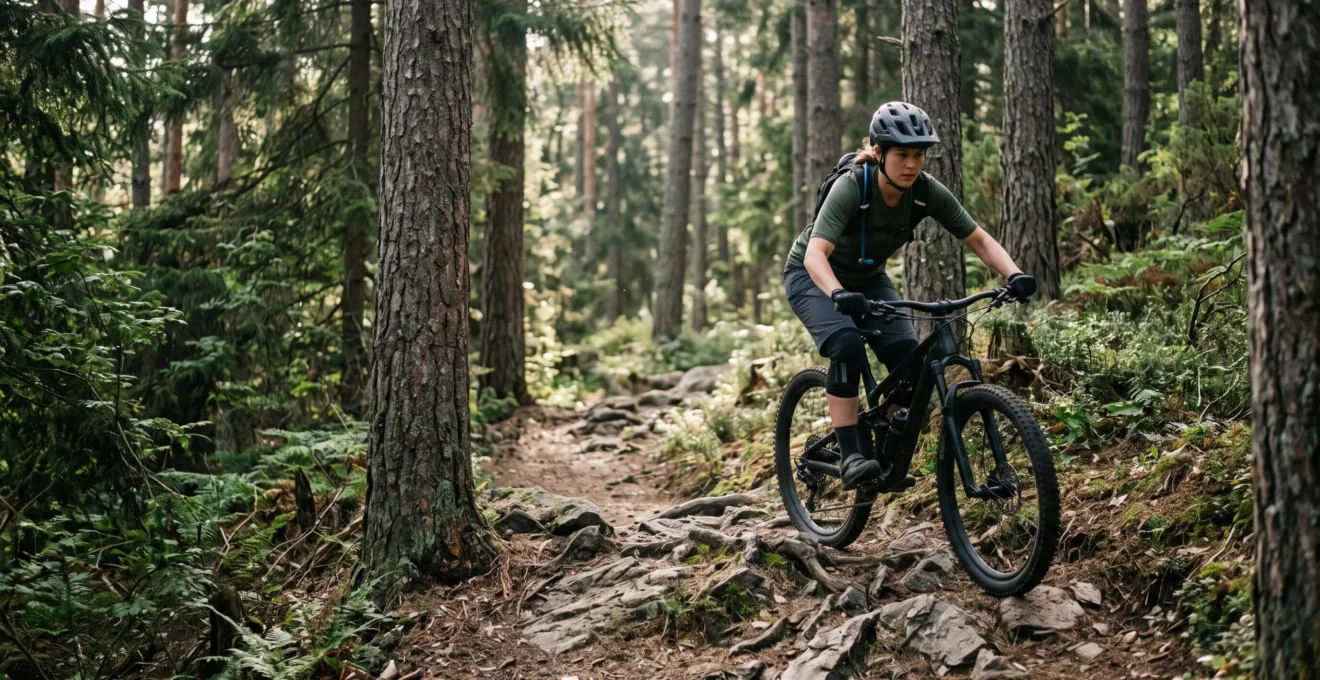
In summary:
- Your bike’s cross-country setup might be optimized for climbing efficiency, but it actively works against you on steep, technical descents, increasing crash risk.
- Fear isn’t a weakness; it’s a physiological response to a perceived lack of control. Mastering bike-body separation is the physical antidote to this fear.
- Progress comes from deliberate practice (« sessioning ») on short, challenging sections, not just accumulating « junk miles » by riding conservatively.
- Most severe crashes are preventable. They are often caused by stiffness and poor body position, which can be corrected with specific drills.
That feeling of your stomach dropping as the trail narrows and points downhill, littered with a chaotic maze of roots and rocks. Your hands clamp onto the brakes, your body goes rigid, and every instinct screams « danger. » You’re a capable rider on fire roads and smooth trails, but technical singletrack feels like a different sport entirely. It’s a frustrating barrier, where the joy of mountain biking is replaced by a constant, nagging fear of a spectacular crash.
Many will tell you to « just look ahead » or « stay loose, » but this advice often fails because it ignores the root cause. The problem isn’t a lack of bravery; it’s a technical and mental deficit. Your brain, sensing a loss of control, defaults to survival instincts that are counterproductive on a mountain bike. True confidence doesn’t come from ignoring fear, but from systematically dismantling it with a deep understanding of technique and physics.
This guide moves beyond the usual platitudes. We will deconstruct the core elements that separate fearful riding from fluid control. We’ll explore why your bike setup could be sabotaging you, how to train your eyes to see a path through the chaos, and master the single most important body position adjustment to prevent going over the handlebars. This is your technical roadmap to transforming fear into flow, one challenging section at a time.
To navigate this journey from apprehension to confidence, we’ll break down the essential skills and mindset shifts into a clear, structured path. The following sections will guide you through each critical component, providing the technical knowledge and actionable drills you need to progress safely and effectively.
Summary: How to Ride Technical Singletracks Without Constant Fear of Crashing?
- Why Do Cross-Country Bike Settings Cause 70% More Crashes on Technical Singletracks?
- How to Scan Technical Trails 5 Meters Ahead to Choose the Smoothest Line?
- Aggressive Line Attacks vs Conservative Clean Riding: Which Builds Technical Skills Faster?
- The Technical Riding Error That Sends 50% of Stiff Riders Over the Handlebars
- When Should You Walk a Technical Section Rather Than Risk Injury Riding It?
- Why Do Your Quads Burn on Steep Ascents Even When Your Cardio Feels Fine?
- Why Do Efficient Road Runners Often Struggle with Trail Running Technique?
- How to Transition from Road Running to Trail Running Without Injury?
Why Do Cross-Country Bike Settings Cause 70% More Crashes on Technical Singletracks?
The bike that feels fast and efficient on a fire road climb often becomes a liability when the trail gets steep and technical. The reason lies in its geometry and setup, which are optimized for pedalling power, not descending stability. A typical cross-country (XC) bike features a steep head angle, a longer stem, and a more forward-leaning rider position. While this is great for putting power down, it places your centre of gravity higher and further forward, making you more susceptible to going « over the bars » (OTB).
This isn’t just theory; it’s borne out by data. Technical descents are precisely where the most severe accidents happen. In fact, a scientific review of cross-country mountain biking found that crashes occur most frequently in these sections, with riders often falling forward over the handlebars. The setup that makes you a rocket on the climbs dramatically reduces your margin for error when gravity takes over. The short wheelbase and quick steering that feel « nimble » on flat ground can translate to « twitchy » and unstable when navigating rocks and roots at speed.
Furthermore, suspension on an XC bike is often tuned to be firmer to prevent pedal bob, meaning it’s less effective at absorbing the harsh, repetitive impacts of a rock garden. Instead of the bike soaking up the terrain, the impacts are transferred directly to you, disrupting your balance and fatiguing your body. This mismatch between bike setup and terrain difficulty is a primary factor that multiplies crash risk, turning a challenging feature into a potential site for injury. Understanding this limitation is the first step: your bike isn’t broken, it’s just built for a different primary purpose.
How to Scan Technical Trails 5 Meters Ahead to Choose the Smoothest Line?
The most common advice in mountain biking is « look where you want to go, » but it’s an oversimplification. On a technical trail, your brain is processing a massive amount of information. The secret isn’t just looking ahead; it’s developing an active scanning vision system. This means continuously shifting your focus between different zones to build a mental map of the trail, rather than fixating on a single point.
Your vision should operate on two levels. First is your far-focus, about 5-10 meters ahead, which you use to identify the general flow of the trail, upcoming turns, and major features. This is where you make strategic decisions: « I’ll go left of that big rock, then set up for the right-hand turn. » Second is your near-focus, about 1-3 meters ahead, which confirms your tyre placement and allows for micro-adjustments around smaller roots or loose stones. The mistake most riders make is getting trapped in near-focus, staring at their front wheel, a phenomenon known as target fixation. When you stare at the rock you want to avoid, you will inevitably steer directly into it.
A practical way to train this is to consciously alternate your gaze. As you approach a technical section, glance far ahead to pick your line. As you enter the section, trust your peripheral vision to handle the immediate terrain while you’re already looking for your exit and planning the next move. This is a dynamic process. The BikeRadar technique breakdown provides a perfect example: on a switchback descent, a skilled rider uses far-ahead vision to prepare for the next turn while using near-focus to execute the current one. This is how they maintain momentum and precision. Think of it as your brain always being one step ahead of your bike.
Aggressive Line Attacks vs Conservative Clean Riding: Which Builds Technical Skills Faster?
Once you start riding more technical trails, a crucial question arises: is it better to ride conservatively and « clean » the whole trail, or to stop and repeatedly attack a section you can’t manage? While completing a full loop without dabbing a foot feels great for your confidence, it’s the latter approach—deliberate practice—that accelerates skill acquisition. This is the difference between « sending » and « sessioning. »
« Sending » involves riding a trail from start to finish, aiming for flow and consistency. This is essential for building endurance and linking skills together. However, when you do this, you tend to ride within your comfort zone, often avoiding the truly challenging lines. « Sessioning, » on the other hand, means picking a single, short technical feature (a rooty corner, a small drop, a rock garden) that gives you trouble and working on it exclusively. You might try it ten times, getting it wrong nine times, but each failure provides critical data. You learn exactly how much brake you can apply, how your body position affects traction, and where the limits of your bike are.
This targeted approach is far more efficient for skill building. While it might feel like a failure-ridden process, it’s actually a form of rapid, concentrated learning. As Gerow from Singletracks Mountain Bike News notes, « developing advanced mountain bike skills takes time, » and sessioning is the most effective way to use that time.
A balanced strategy is key. The majority of your riding time should be spent enjoying the flow of a full trail, but dedicating a small portion of each ride to sessioning a specific challenge will yield disproportionately large gains in your technical ability. The following table, inspired by an analysis from Singletracks’ guide to skill acquisition, breaks down the two approaches.
| Aspect | Sessioning (Aggressive Attacks) | Sending (Conservative Riding) |
|---|---|---|
| Primary Goal | Master one specific technical move through repetition | Link multiple sections smoothly across a full trail |
| Focus Area | A single 5-10 meter feature or obstacle | Flow and consistency over the whole ride |
| Risk Level | Higher, deliberate limit-testing | Lower, controlled and predictable |
| Failure Role | Treated as data on traction and limits | Avoided to preserve momentum and confidence |
| Recommended Time Share | ~20% of riding time | ~80% of riding time |
The Technical Riding Error That Sends 50% of Stiff Riders Over the Handlebars
The forward-over-the-bars (OTB) crash is the most feared and one of the most common accidents in mountain biking. The cause is almost always the same: a stiff body and poor weight distribution. When the front wheel suddenly stops or slows down—by hitting a rock, a root, or a hole—your body’s momentum continues forward. If you are rigid and your weight is too far forward, you pivot over the handlebars. In fact, a systematic video analysis of 534 mountain bike crashes found that 55.2% were OTB incidents. This isn’t bad luck; it’s bad physics, and it’s entirely correctable.
The antidote is a concept called bike-body separation. Instead of you and your bike being one rigid unit, you must allow the bike to move freely underneath you while your core remains stable and balanced. This is achieved through an « attack position »: chest low, elbows and knees bent, and your weight centered. As the trail gets steeper, you shift your weight back, but crucially, you must also drop your heels. This simple action does two things: it pushes your weight further back and down, lowering your center of gravity, and it locks your feet onto the pedals, giving you a secure platform to push against.
This « dropped heel » position is your primary defense against an OTB. It allows the bike to pivot forward on an impact without taking you with it. Your bent arms and legs act as a secondary suspension system, absorbing the force of the hit. Stiff, straight arms, by contrast, transfer that force directly into your torso, launching you forward. Mastering this dynamic, flexible body position is the single most effective skill for eliminating the fear of going over the bars.
As you can see in the image, the dropped heel creates a powerful connection with the pedal, allowing the rider to drive their weight through the bike’s bottom bracket for maximum stability and control. This is the foundation of confident descending.
Your Action Plan: Body Position Checklist for Steep Terrain
- Get in the attack position: Stand on your pedals with your feet level, knees and elbows bent, and look ahead.
- Lower your chest towards the handlebars while simultaneously shifting your hips back, away from the seat.
- As the trail steepens, actively drop your heels below the level of the pedal axle. Feel your calves stretch.
- Keep your arms bent and relaxed. They are your shock absorbers. Allow the bike to move underneath you.
- Maintain weight on the front wheel for traction by keeping your chest low; don’t move so far back that the front end becomes light and washes out.
When Should You Walk a Technical Section Rather Than Risk Injury Riding It?
Progression in mountain biking is about pushing your limits, but it’s also about knowing when not to. The decision to walk a section is not a sign of failure; it’s a sign of a smart, experienced rider who understands risk management. Pride can be a dangerous motivator. A serious injury will set your progress back far more than the few seconds it takes to dismount and walk. So, how do you make that call?
The key is to perform a quick but effective hazard assessment before you commit. This mental checklist should become second nature. Stop before the feature and take a good look. What are the real hazards? Is it a single large drop, or a series of smaller, unpredictable obstacles? Are the conditions a factor—wet roots, loose gravel? What is the « run-out » like? If you fail, is there a safe place to bail out, or does the trail fall away steeply? This analysis, as recommended by trail experts at REI, should happen well before you’re on top of the feature, giving you time to decide on a clear line and commit fully—or walk away.
Your internal state is just as important as the external terrain. Are you feeling fatigued? Is your focus wandering? Are you riding with a group that is pushing you beyond your comfort level? If the answer to any of these is yes, your risk of making a mistake is significantly higher. The best riders have nothing to prove. They understand that the goal is longevity in the sport. Choosing to walk a section today so you can come back and ride it with confidence tomorrow is the smartest decision you can make.
The rider in this scene is doing exactly the right thing: pausing to analyze the challenge ahead. This moment of contemplation is a critical skill, allowing for a calculated decision rather than a reactive, and potentially dangerous, one.
Why Do Your Quads Burn on Steep Ascents Even When Your Cardio Feels Fine?
You’re grinding up a steep climb. Your breathing is under control, your heart rate is manageable, but your quadriceps are on fire, feeling weak and inefficient. This is a common and frustrating problem for many riders, and it’s often a sign of a biomechanical imbalance rather than a lack of fitness. The issue typically lies not in your legs, but in your hips and glutes. Your glutes are the most powerful muscles in your body, but if they aren’t firing properly, your quads are forced to take over a job they weren’t designed to do alone.
This dysfunction is often caused by tight hip flexors, a common side effect of sitting for long periods. When your hip flexors are tight, they inhibit their opposing muscles: the glutes. As the Aletha Health team explains, if your glutes aren’t activating, « your hip muscles will not be able to properly support your hip, » leading to instability and forcing other muscles to compensate. On a bike, this means your pedal stroke is dominated by your quads, leading to rapid fatigue and a feeling of « dead legs » on climbs.
The solution involves improving your hip mobility and consciously activating your glutes. Think about « dropping your heel » at the bottom of the pedal stroke and « scraping mud off your shoe » at the back. This encourages a fuller, more circular motion that engages the entire posterior chain. Off the bike, regular hip mobility exercises and glute activation drills (like bridges and clamshells) are essential. A strong, functional core is also critical for providing a stable platform for your legs to push against. By fixing the root cause in your hips, you can unlock more power, improve your endurance on climbs, and have more energy left for the technical descents that follow.
Actionable Checklist: Assess Your Climbing Biomechanics
- Hip Flexor Test: Perform a half-kneeling hip flexor stretch. If you feel intense tightness or can’t achieve a neutral pelvis, your hip flexors are likely restricting your glute activation.
- Glute Activation Check: Lie on your back and perform a glute bridge. Can you feel your glutes contracting strongly, or do your hamstrings and lower back do most of the work?
- On-Bike Focus: On your next climb, dedicate a few minutes to focusing solely on your pedal stroke. Consciously think about engaging your glutes to push down and pull back.
- Fatigue Assessment: Note when your form breaks down under fatigue. As mobility expert Rouvy points out, the real test is whether you can control the position when tired, not just when fresh.
- Action Plan: Based on your findings, incorporate targeted hip flexor stretches and glute activation exercises into your weekly routine.
Why Do Efficient Road Runners Often Struggle with Trail Running Technique?
To better understand the challenge of transitioning to technical singletrack, it’s useful to look at an analogy from a sister sport: the move from road running to trail running. An elite marathoner, despite having a world-class cardiovascular engine, will often look clumsy and be surprisingly slow on a technical, rocky trail. Their fitness is not in question, but their technical skill set is. This highlights a critical principle: general fitness does not automatically translate to specific technical competence.
Road running occurs on a predictable, uniform surface. The body adapts by developing a highly efficient, repetitive stride. Muscle activation is consistent, and the primary demand is cardiovascular. Trail running, however, is a chaotic environment. The surface is constantly changing, requiring thousands of micro-adjustments in foot placement, balance, and stride length. This recruits a vast network of smaller, stabilizing muscles in the feet, ankles, and hips that are largely dormant during road running. As Dr. Stevenson notes in Outside Online, « ankle proprioception and stability would generally be more relevant for a trail runner. » Proprioception—your body’s sense of its position in space—is paramount.
This is a direct parallel to the mountain biker who is strong on fire roads but fearful on singletrack. Your « fire road fitness » is like the marathoner’s engine. It’s essential, but it doesn’t prepare you for the unique demands of an unpredictable environment. A comparative analysis of the biomechanics confirms that trail environments demand coordination and reactivity, not just power. The singletrack rider, like the trail runner, must develop a heightened sense of proprioception, quicker reaction times, and the ability to absorb and adapt to uneven terrain. Your fitness gives you the capacity to handle the trail, but it’s your technique that allows you to do it safely and efficiently.
Key Takeaways
- Fear is a technical problem, not a courage problem. It can be deconstructed and managed with the right skills.
- Your body position is your primary safety system. Master bike-body separation and the « dropped heel » technique to prevent the most common crashes.
- True progress comes from targeted, deliberate practice on challenging sections (« sessioning »), not just from riding more miles.
How to Transition from Road Running to Trail Running Without Injury?
Continuing our analogy, the way a road runner safely transitions to trails provides the perfect blueprint for a « fire road specialist » looking to conquer technical singletrack. A runner who takes their 10k road pace directly to a rocky mountain path is asking for a rolled ankle or a fall. The key to a successful transition is gradual adaptation and a focus on building new skills, not just leveraging old strengths.
The first step is to start on terrain that bridges the gap. For a runner, this means swapping pavement for smooth, buffed-out dirt trails or gravel paths before tackling rooty, technical terrain. For a mountain biker, this means seeking out flowing, « green » or « blue » singletrack with gentle turns and minimal obstacles. This allows your body and brain to adapt to a slightly less predictable surface without being overwhelmed. You’re building the foundation of proprioception and learning to let the bike move a little underneath you.
Next is to expect and embrace a change in pace and muscle engagement. As Active.com’s Tim Sorenson states, « Trails are naturally an unstable environment covered with rocks, sticks, branches. » Navigating this requires engaging stabilizing muscles in your core, hips, and ankles that were underutilized on smooth surfaces. You will be slower, and that’s not only okay, it’s necessary. Trying to maintain your fire road speed on technical trail is the fastest way to crash. Instead, focus on smoothness, control, and choosing good lines. This deliberate, skill-focused approach gives your body time to adapt and strengthen, preventing the overuse injuries and confidence-shattering falls that plague those who transition too quickly.
Now that you understand the principles, the next logical step is to apply them. Start by identifying one small, technical section on your local trail that intimidates you, and dedicate just ten minutes of your next ride to sessioning it. Focus on your body position, vision, and line choice. This is how you begin to turn theory into skill and fear into confidence.