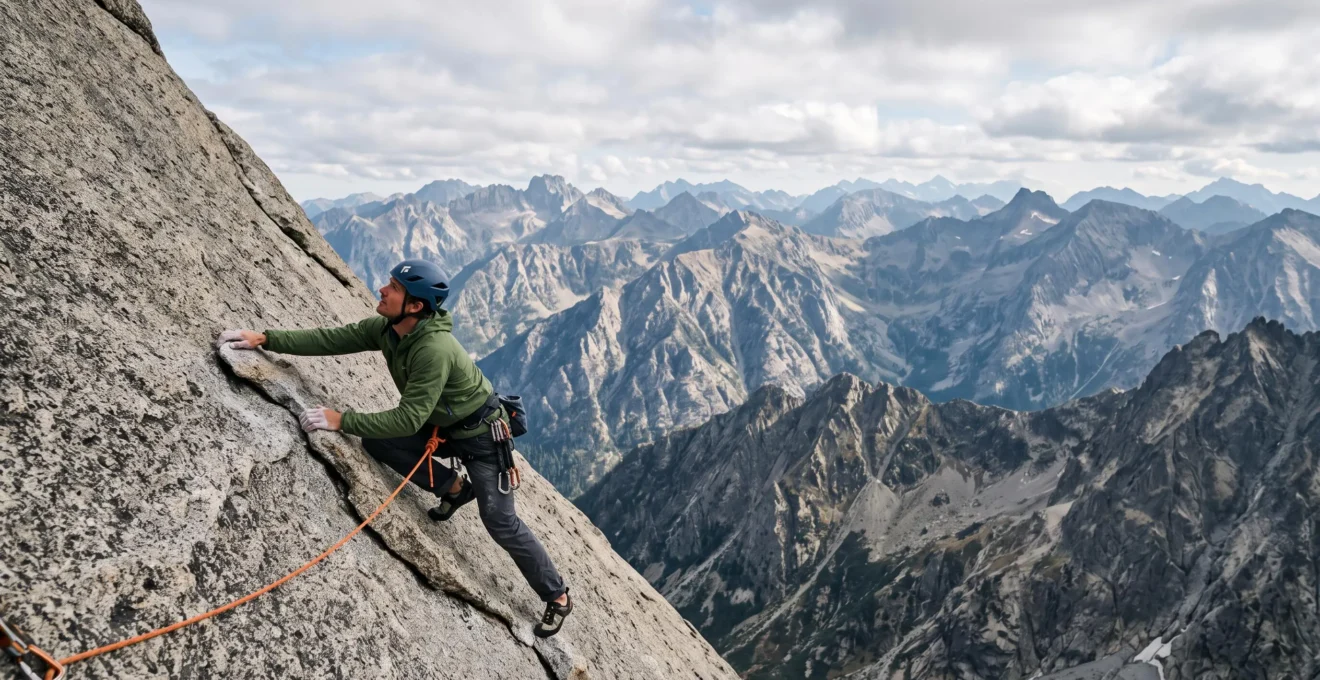
The biggest risk for scramblers moving to climbing isn’t the steepness of the rock, but the dangerous illusion that it’s simply ‘harder scrambling’.
- True competence lies in mastering safety systems, not just developing physical strength.
- Formal training is non-negotiable to avoid common, life-threatening errors in anchor building and belaying.
Recommendation: Prioritise finding a certified instructor over buying advanced gear; your first investment should be in knowledge, not equipment.
For any experienced UK scrambler, there’s a familiar moment of truth. You’re high on a classic route, perhaps navigating the airy exposure of Crib Goch or the rocky steps of Striding Edge, and you encounter a section that feels different. It’s steeper, more committing. The handholds are smaller, the consequences of a slip more severe. The temptation is to push on, relying on the same grit and self-reliance that got you this far. This is the single most dangerous point in your mountain journey.
The common advice is to « go to a climbing gym » or « learn from a friend. » While well-intentioned, this advice misses the fundamental truth of the mountains. Progressing from scrambling to technical climbing is not a linear increase in difficulty; it is a paradigm shift. It requires you to unlearn the scrambler’s solo mindset and adopt the climber’s meticulous dedication to system integrity. It’s about understanding that your life depends not on your individual strength, but on a chain of equipment and procedures where every single link—from knot to anchor to partner communication—must be flawless.
This guide moves beyond the platitudes. As a certified instructor, my focus is safety-critical. We will not just look at how to climb, but how to think like a climber. This means shifting your perspective from simple movement to mastering the non-negotiable safety systems that allow for ascent on technical terrain. We will deconstruct the common and often fatal errors made by the self-taught and build a foundational understanding of the procedures that keep you safe when the ground is a long way down. This is your transition from self-reliant scrambler to responsible technical climber.
This article provides a structured progression, from building your foundational mountain sense to understanding the critical safety systems required for technical rock. The following sections break down each stage of this essential learning journey.
Summary: A Scrambler’s Guide to Technical Rock Climbing Skills
- How to Safely Progress from Lowland Walks to Mountain Hiking in the UK?
- When Are You Ready to Hike UK Mountains Solo Without a Guide?
- When Does a Scrambling Route Become Dangerous Enough to Require a Rope?
- Why Do 80% of Self-Taught Climbers Have Dangerous Anchor-Building Errors?
- How to Construct Safe 3-Point Equalized Anchors for Outdoor Top-Roping?
- Gym Climbing Practice vs Outdoor Rock Courses: Which Develops Technical Mountain Skills Faster?
- The Technical Climbing Error That Causes 40% of Partner-Belay Accidents
- When Do Technical Mountain Routes Require Professional Guiding for Safety?
How to Safely Progress from Lowland Walks to Mountain Hiking in the UK?
Before you even consider a rope, you must first master the mountain environment itself. This progression is the bedrock of your safety pyramid. Lowland walking teaches you pacing and basic kit management, but the UK’s mountains—from the often-claggy peaks of the Lake District to the vast plateaus of the Cairngorms—demand a significant step-up in skills. The primary focus must shift to robust navigation and weather interpretation. A cheap compass is useless if you can’t use it in a whiteout, and a smartphone app is a poor substitute for understanding how to read a synoptic chart and recognise developing weather fronts.
The goal is to build ‘mountain sense’. This is an intuitive understanding of the terrain, your own physical limits, and the rapidly changing environment. It involves learning how to manage your energy over a long day with significant ascent and descent, understanding the effects of wind chill at altitude, and knowing what to pack for a ‘just in case’ scenario that could realistically occur. This stage involves gradually increasing the length, remoteness, and difficulty of your walks. Start with popular, well-trodden mountain paths before venturing onto less-defined terrain. Every walk should be a lesson in planning and preparedness.
Your equipment evolves at this stage too. It’s not about having the most expensive gear, but the right gear. This means waterproofs that can withstand hours of driving rain, boots that support your ankles on rough ground, and a pack that carries everything you need for a full day, including an emergency shelter, extra food, water, and a head torch. This foundational stage is complete when you can confidently plan and execute a full day in the mountains in varied three-season conditions, returning to the car park tired but safe.
When Are You Ready to Hike UK Mountains Solo Without a Guide?
Venturing into the mountains solo is a significant milestone that requires more than just good navigation skills; it demands complete self-reliance. The question isn’t just « can I find my way? » but « can I solve every problem that arises on my own? » Before attempting a solo mountain day, you must have extensive experience hiking with others in a wide range of conditions, including poor weather and low visibility. You should be the person in the group who is confident with the map, not the one who follows.
The key readiness indicators are your decision-making and emergency preparedness. Are you able to make a sound, objective decision to turn back when conditions deteriorate or when you’re more fatigued than planned? Stubbornness is a liability in the mountains. You must be your own risk manager. Furthermore, you need to have a bulletproof emergency plan. This means carrying and knowing how to use a personal locator beacon (PLB) or satellite messenger in areas with no phone signal, possessing basic first-aid skills to manage an injury, and having the gear (and knowledge) to survive an unplanned night on the hill.
Your first solo trips should be on familiar, popular routes where help is more likely to be nearby. Use these trips to build confidence in your own judgment. A true test of readiness is navigating a complex route solo on a day with a challenging but manageable weather forecast. Successfully completing this demonstrates not just technical skill, but the crucial mental fortitude and risk-management discipline required for solo travel. You are ready when the thought of being alone on a remote summit in changing weather inspires respect and careful planning, not fear.
When Does a Scrambling Route Become Dangerous Enough to Require a Rope?
This is the critical transition. In the UK, scrambling is graded, and understanding these grades is your first line of defence. A Grade 1 scramble, like Striding Edge in the Lake District, is essentially a very exposed walk. You use your hands for balance, but the route is generally obvious. A Grade 2 requires more regular use of hands on steeper rock and the route-finding is more complex. A Grade 3 scramble blurs the line with easy rock climbing, often involving short, difficult moves where a rope might be reassuring.
The defining question is this: what are the consequences of a slip? On a walk, a slip might result in a twisted ankle. On a Grade 1 scramble, it could lead to a serious, tumbling fall. On steeper Grade 2 or 3 terrain, a slip is no longer a slip; it is a fall from height, and it is likely to be fatal. The moment the consequence of a simple mistake becomes catastrophic is the moment you need a rope. It’s not about how ‘hard’ the moves feel to you; it’s an objective assessment of the terrain’s danger.
However, simply carrying a rope is not a solution; in fact, it can create a false sense of security. Using a rope incorrectly is arguably more dangerous than using no rope at all, as it can lead to taking risks you otherwise wouldn’t. A rope is not a magic talisman; it is one part of a complex safety system that includes anchors, harnesses, belay devices, and, most importantly, the knowledge to use them all correctly. When you identify a route where a fall is unacceptable, you have also identified your own knowledge gap. This is the point where you must stop and seek formal instruction.
Why Do 80% of Self-Taught Climbers Have Dangerous Anchor-Building Errors?
The transition to using a rope introduces the single greatest area of risk for the untrained: building anchors. For a scrambler used to trusting their own hands and feet, the concept of trusting their life to a system of slings and knots can be abstract. This leads to a dangerous gap between confidence and competence. Many self-taught climbers can tie a few knots but fundamentally misunderstand the physics of forces and the principles of redundancy. They build anchors that look plausible but contain hidden, fatal flaws.
This isn’t speculation. In fact, a 30-year analysis of AAC accident data shows that Anchor Failures top the list of contributing factors in top-rope accidents. Why is the error rate so high? It’s because a safe anchor isn’t just a strong anchor; it’s a system. Errors often stem from:
- Poor Assessment: Relying on a single, large block of rock without properly assessing its stability or the quality of the rock itself.
- Lack of Redundancy: Building an anchor around a single point of failure. If that one piece fails, the entire system collapses.
- No Equalization: Failing to distribute the load evenly across multiple anchor points, which can lead to one piece being shock-loaded to failure.
- Ignoring Extension: Creating a system where the failure of one piece causes the rope to suddenly drop or extend, shock-loading the remaining pieces.
As the American Alpine Club’s official accident reports consistently highlight, a core principle is that « toprope anchors should have redundancy throughout the system. » This is not an intuitive skill. It is a technical, engineering-based discipline that must be learned from a qualified source. The self-taught climber often only discovers their anchor-building errors when the anchor fails. At that point, it is too late.
How to Construct Safe 3-Point Equalized Anchors for Outdoor Top-Roping?
A safe anchor is not a matter of opinion or style; it is a matter of physics and procedure. The gold standard for building traditional anchors for top-roping outdoors is to follow the SRENE (or ERNEST) principles: it must be Solid, Redundant, Equalized, and have No Extension. This means every component must be unquestionably strong, you must use multiple independent points, the load must be distributed between them, and failure of one point cannot cause the system to drop.
In practice, this is most commonly achieved by building an anchor from three independent and « bombproof » points—be it solid rock features, well-placed climbing gear, or sturdy trees. The key is then connecting these three points into a single master point using materials like a cordelette (a loop of accessory cord) or a long webbing sling. The goal is to create a setup where the forces are perfectly balanced and a failure of any single point does not compromise the entire system.
Different materials and methods can be used to achieve equalization, each with its own specific use case and limitations. Understanding which to use and when is a critical skill learned through hands-on practice under expert supervision. The following table breaks down some common methods for achieving this.
| Method | Equalization Type | Best Use Case | Key Consideration |
|---|---|---|---|
| Cordelette | Static | Fixed direction of pull (straight down) | Easy to build, but not self-adjusting if load direction shifts |
| Sliding-X / Webbing Sling | Semi self-equalizing | Variable direction of pull | Requires limiter knots to control extension on failure |
| Quad Anchor | Self-equalizing | Two side-by-side bolts | Redundant masterpoint, popular at sport crags |
| Rope as Anchor Material | Static, tied directly | When slings/cordelette are insufficient | Saves gear weight but consumes climbing rope length |
Mastering these configurations requires learning specific knots and understanding how to assess angles and forces. An angle of over 60 degrees at the master point, for example, will start to multiply the force on each anchor piece, making the system weaker, not stronger. This is the kind of critical, non-obvious detail that formal training provides.
Gym Climbing Practice vs Outdoor Rock Courses: Which Develops Technical Mountain Skills Faster?
Many aspiring climbers believe that months spent in an indoor climbing gym will prepare them for the challenges of outdoor mountain routes. This is a dangerous misconception. While a gym is an excellent environment for building physical strength, developing basic movement skills, and improving endurance, it is a sterile and controlled setting. It does not, and cannot, teach the most critical skills needed for technical mountaineering.
Outdoor rock courses, taught by certified instructors, focus on the very elements the gym lacks: hazard acuity and system integrity. On real rock, you learn to assess the quality of the stone, identify loose blocks, and deal with variable conditions like moisture and lichen. You learn to place your own protection, build your own anchors from natural features, and manage a rope effectively to avoid snags or dislodging rocks onto your partner. These are life-saving skills that are simply not part of the gym experience.
The gym trains the athlete; an outdoor course trains the mountaineer. While gym practice is a valuable supplement, it cannot replace the structured learning process of a proper course. Progress in the mountains is measured by your judgment and procedural discipline, not by the grade you can climb on plastic holds. A climber who can only lead a 5a at the gym but has solid ropework and anchor skills is far safer and more competent in the mountains than a 6b gym climber who has never dealt with real rock or built their own belay.
Action Plan: Developing a Well-Rounded Climbing Skillset
- Broaden Your Experience: Actively try diverse climbing styles—bouldering, trad climbing, sport climbing, and gym sessions—to build a wide array of skills and adaptability.
- Assess Your True Level: Determine your climbing grade through flash attempts (climbing a route first try) in the gym, rather than spending excessive time projecting a single, difficult route.
- Prioritise Outdoor Mileage: After initial training, focus on completing a high volume of easier outdoor routes to practice gear placement, rope management, and route-finding in a real-world setting.
- Learn Weather & Navigation: Dedicate specific training days to non-climbing mountain skills, such as navigating in poor visibility and interpreting mountain weather forecasts.
- Find a Mentor or Instructor: Engage with a certified instructor for periodic skill reviews to identify and correct bad habits before they become ingrained.
The Technical Climbing Error That Causes 40% of Partner-Belay Accidents
While anchor failure is a primary cause of top-rope accidents, a different error plagues climbers during lead climbing: complacency in the belay system. Specifically, the failure to perform a thorough, physical partner check before every single climb. It sounds simple, almost insultingly so, yet it is a step that is shockingly often missed. Climbers become comfortable with their partners, they are distracted by conversation, or they simply assume everything is correct.
This complacency is deadly. A partner check is a final, critical firewall against human error. It involves both the climber and the belayer visually and physically inspecting each other’s setup: Is the harness buckled correctly? Is the tie-in knot (usually a figure-eight) tied properly with a stopper knot? Is the rope threaded through the belay device in the correct orientation? Is the carabiner locked? These are simple questions, but a « no » to any one of them can lead to a ground fall. Shockingly, a Climbing Wall Association study found that only 54% of climbers double-checked if they were properly tied-in, and only 56% double-checked their belay device.
The consequences of skipping this step are not theoretical. They are documented in tragic, and entirely preventable, accident reports every year.
Case Study: Preventable Ground Fall at Red River Gorge
According to a report in Accidents in North American Climbing, a 59-year-old climber at the Red River Gorge fell approximately 130 feet to his death when his tie-in knot failed. He had verbally confirmed to his belayer that the knot was secure. However, she did not perform her own visual or physical check and was unfamiliar with the specific knot he had used. The analysis from the American Alpine Club underscores that a physical partner check should never be skipped, regardless of a partner’s stated experience or confidence. It is a non-negotiable part of the safety procedure.
This demonstrates the core principle of procedural discipline. Safety in climbing is not about trust in a person’s experience; it’s about trust in a shared, rigorously applied procedure. The partner check must become an automatic, non-negotiable ritual at the start of every single climb.
Key Takeaways
- Progressing from scrambling is a mental shift to ‘system integrity’, not just a physical challenge.
- Formal, certified instruction is non-negotiable for learning ropework; learning from friends or online is a high-stakes gamble.
- The partner check is a life-saving ritual. Complacency in this one step is a leading cause of accidents.
When Do Technical Mountain Routes Require Professional Guiding for Safety?
Even with excellent personal skills, there comes a point where the scale and complexity of an objective may exceed your experience level. Knowing when to hire a professional guide is not a sign of weakness; it is a sign of mature judgment and good risk management. This decision revolves around your ability to assess and mitigate two types of hazards: objective and subjective.
Subjective hazards are factors you control: your fitness, your skills, your planning, and your equipment. Through training and experience, you can reduce these risks. Objective hazards are factors outside your control: weather, rockfall, avalanches, and the condition of the route. You cannot eliminate these; you can only try to avoid them through careful planning and by having a deep well of experience to draw upon for decision-making. A professional guide’s primary value lies in their vast experience in assessing and managing objective hazards.
The decision to hire a guide should be considered when you face a significant increase in objective hazard, or when a route requires a level of subjective skill you have not yet consolidated. This is especially true for complex multi-pitch routes in big mountain environments like the Alps or the Scottish Highlands in winter.
As this data from mountain safety experts shows, recognizing the difference is the first step in making a safe decision. The most dangerous situations arise when climbers are unaware of the hazards they face.
| Hazard Type | Definition | Examples | Mitigation |
|---|---|---|---|
| Objective | Outside the climber’s control | Weather, rockfall, avalanches, errors of other parties | Recognize and route around; sometimes the answer is to stay home |
| Subjective | Related to the climber’s own decisions and condition | Lack of experience, poor fitness, poor planning, ignorance | Training, planning, acquiring skills and proper equipment |
Ultimately, a culture of safety must empower every member of a team to speak up. As one professional guide service puts it, this is a non-negotiable rule.
Any member of any climbing team, be they client, guide or recreational climber, should have veto power over any objective; if the perceived level of risk becomes too high, the party can turn around.
– Mont Blanc Mountain Guide, montblancmountainguide.com
Hiring a guide is an investment in your safety and an opportunity to learn and accelerate your own skills in a high-consequence environment.
Your next step isn’t buying more gear; it’s investing in certified training. Look for instructors accredited by bodies like Mountain Training to ensure your journey into technical climbing is as safe as it is rewarding.