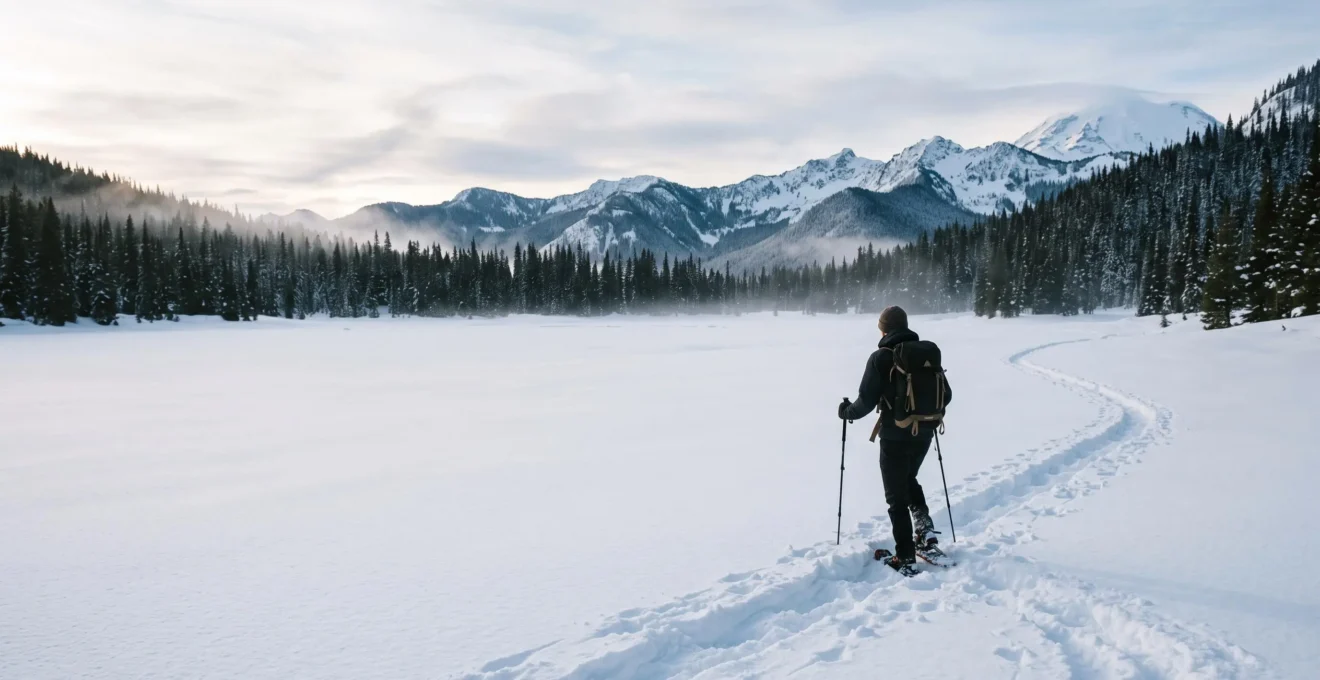
For the passionate UK hiker grounded by snow, snowshoeing isn’t just ‘winter walking’—it’s the key to unlocking 90% more of the landscape by mastering the physics of the snow itself.
- Effective snow travel relies on flotation to save energy, not brute force to fight through deep snow.
- Your summer layering knowledge must evolve into an active thermoregulation system to manage sweat and prevent dangerous chilling.
- Basic snowpack awareness and understanding terrain are more critical for safety than any piece of gear.
Recommendation: Shift your mindset from conquering a trail to reading the snow, and you’ll transform your four-season hiking ambitions into a reality.
If you’re a keen hiker in the UK, you know the feeling. The hills you stride across in summer—be it in the Lake District, Snowdonia, or the Scottish Highlands—transform under a blanket of snow. They seem both magical and inaccessible. The temptation is to either hang up your boots or try to force your way through, an exhausting effort known as ‘post-holing’ that often ends in cold, wet retreat. Many assume winter requires the highly technical skills of climbing or skiing, leaving vast, beautiful landscapes just out of reach.
The common advice is often to just « get some snowshoes, » but this misses the fundamental shift in mindset required. It’s not about bigger footwear; it’s about a different relationship with the environment. This isn’t just walking. It’s about learning the principles of flotation, energy economy, and proactive thermoregulation. The real key to unlocking the winter mountains isn’t just gear, but understanding *why* that gear works and how the snowy environment behaves differently from the dry trails you know.
This guide is for you, the experienced summer hiker. We’ll bridge the knowledge you already have about exertion, gear, and navigation with the specific science of snow travel. We’ll move beyond the ‘what’ and dive into the ‘why’, focusing on the core principles that will turn you from a winter-wary walker into a confident snowshoer, ready to explore the quiet beauty of the off-season.
In this guide, we will explore the foundational principles that make snowshoeing so effective, from the physics of flotation to the crucial safety assessments you need to make before stepping onto the snow. The following sections break down everything you need to know to get started safely and confidently.
Contents: A Hiker’s Path to Snowshoeing Mastery
- Why Does Snowshoeing Allow Access to 90% More Winter Trails Than Boot Hiking?
- How to Choose Snowshoes for Your Body Weight and Typical Snow Conditions?
- Groomed Snowshoe Trails vs Backcountry Routes: Which for Winter Beginners?
- The Snowshoeing Error That Leads to Dangerous Overheating Then Chilling
- When Does Snowshoeing Require Avalanche Safety Gear and Training?
- Microspikes vs Snowshoes: Which Winter Traction Device for Variable Snow Conditions?
- Why Do Seemingly Gentle Snow Fields Cause 30% of Recreational Avalanche Deaths?
- How to Cross Open Powder Fields Without Sinking or Triggering Avalanches?
Why Does Snowshoeing Allow Access to 90% More Winter Trails Than Boot Hiking?
The secret to snowshoeing’s effectiveness lies in a single word: flotation. When you try to walk through deep snow in just your hiking boots, your entire body weight is concentrated on a small surface area. You sink, often up to your knees or hips. This ‘post-holing’ is incredibly inefficient and physically demanding. In fact, studies show that cold-weather hiking burns up to 34% more calories than in mild conditions, and post-holing sends that number skyrocketing. You’re not just moving forward; you’re constantly lifting your legs out of deep, heavy snow.
Snowshoes solve this by dramatically increasing the surface area under your feet, distributing your weight over a much larger patch of snow. This allows you to stay on top of the snowpack instead of plunging into it. It’s the difference between fighting the snow and working with it. This superior energy economy is what opens up the winter landscape. Trails that would be utterly impassable on foot become manageable routes, allowing you to cover far more ground with less effort, preserving your energy for warmth and enjoyment.
As this image shows, snow isn’t a uniform substance. It can be light powder, dense wind-slab, or an icy crust. By providing flotation, snowshoes allow you to traverse these varied textures with a consistent level of effort, turning a struggle into a rhythmic walk and making the winter world your playground.
How to Choose Snowshoes for Your Body Weight and Typical Snow Conditions?
Choosing the right snowshoes isn’t as simple as picking a colour. The most critical factor is selecting a size that provides adequate flotation for your ‘effective load’. This isn’t just your body weight; it’s the total weight you’ll be carrying on the snow. As a hiker, you know gear adds up. A casual day-hike load of 10-15 lbs is far lighter than a full backcountry pack which can weigh 25-40 lbs or more. This extra weight must be factored into your decision.
Manufacturers provide sizing charts that correlate snowshoe length to a maximum recommended load. A longer snowshoe offers more surface area and thus more flotation, which is essential for heavier loads or for travelling in very light, dry powder. A shorter snowshoe is more manoeuvrable, which is better for compact snow or forested trails. As a beginner, it’s wise to size up slightly if you’re on the border between two sizes, as extra flotation is more forgiving than not enough.
| Snowshoe Length | Maximum Recommended Load |
|---|---|
| 20 inch (youth) | Up to 80 lbs |
| 21 inch | Up to 125 lbs |
| 22 inch | Up to 150 lbs |
| 25 inch | Up to 175 lbs |
| 30 inch | Up to 220 lbs |
| 35–36 inch | Over 220 lbs |
Beyond length, consider the type. There are three general categories: flat terrain models for casual walking, rolling terrain models (the all-rounders) with more aggressive crampons for grip on hills, and mountain terrain models with advanced bindings and heel lifts for steep ascents. For most UK hiking terrain, a good ‘rolling terrain’ snowshoe is the perfect starting point.
Groomed Snowshoe Trails vs Backcountry Routes: Which for Winter Beginners?
As an experienced hiker, the call of the wild ‘backcountry’—the untracked, open fells and mountainsides—is strong. However, in winter, the distinction between a managed trail and the backcountry becomes a critical safety boundary. For a beginner snowshoer, starting on groomed or marked trails is non-negotiable. These are often found at ski centres (like those in the Cairngorms) or dedicated winter parks. They offer a controlled environment to master the basics without the added risks of navigation and avalanche danger.
Think of these groomed trails as your training ground. This is where you test your gear, get used to the different walking gait, and, most importantly, dial in your clothing system in a low-risk setting. The backcountry introduces complex challenges: you are responsible for your own navigation, risk assessment, and rescue. The snowpack is unmanaged and its stability is unknown. Before venturing off-piste, you must be comfortable with your equipment and have a solid understanding of winter safety protocols.
Professional avalanche safety courses use a framework to classify terrain. For instance, AIARE (American Institute for Avalanche Research and Education) defines terrain as Simple, Challenging, or Complex. Simple terrain has gentle slope angles and low consequences if a slide occurs. Complex terrain involves steep slopes, gullies, and significant exposure to hazards. As a beginner, you must stay in Simple terrain. Groomed trails are, by definition, Simple terrain, making them the only responsible place to start your snowshoeing journey.
The Snowshoeing Error That Leads to Dangerous Overheating Then Chilling
As a hiker, you already know how to layer. But snowshoeing introduces a physiological challenge that requires a more active approach: the cycle of intense heat generation followed by rapid cooling. The most common mistake I see beginners make is dressing too warmly at the trailhead. You feel comfortable standing still, but ten minutes of exertion in snowshoes generates a surprising amount of heat. You start to sweat heavily, soaking your base layers. Then, when you stop for a break, that moisture rapidly cools, chilling you to the bone and creating a dangerous risk of hypothermia.
Naturally, when we arrived at the trailhead, I pulled on my down jacket… You don’t want to get all sweaty.
– Julia Clarke, Why ‘be bold start cold’ is excellent advice for hikers, Advnture
The solution is a proactive thermoregulation system, guided by the mantra: « Be bold, start cold. » You should begin your outing feeling slightly chilly, knowing you’ll warm up within minutes. Your layering isn’t a static outfit; it’s a toolkit. Use zips, cuffs, and hoods to vent heat *before* you start sweating. The goal is to stay dry, both from the outside and the inside.
Your Action Plan: Proactive Thermoregulation for Winter Exertion
- Start Cold: Always begin your snowshoe outing feeling slightly cold, not warm, at the trailhead. Trust that your body will generate heat within the first 10 minutes of movement.
- Make Micro-Adjustments: Use small, frequent adjustments like opening pit-zips, rolling up sleeves, or removing your hat to vent heat before you begin to sweat significantly.
- Prioritise Dryness: Remember that staying warm is fundamentally about staying dry. Your primary goal is to prevent your base layers from becoming saturated with sweat.
- Layer Up at Stops: Add an insulating layer (like a puffy jacket) the moment you stop for a break. Do this *before* your body starts to cool down from the evaporation of stored sweat.
- Assess Your Real Needs: Calculate your ‘Effective Load’ by starting with your body weight, then adding the weight of all your winter clothing, boots, and a fully loaded backpack (water, safety gear, extra layers) to get a true number for sizing charts.
When Does Snowshoeing Require Avalanche Safety Gear and Training?
This is one of the most serious questions in winter recreation, and the answer is simpler than you might think. The need for avalanche safety gear (transceiver, shovel, probe) and the training to use it is dictated by the terrain you enter, not the activity you are doing. If you are snowshoeing in avalanche terrain, you need the gear and the knowledge—no exceptions. Most avalanche fatalities are not due to bad luck, but to human choices, moving into identifiable dangerous areas when safer alternatives exist.
So what is avalanche terrain? The primary indicator is slope angle. The vast majority of avalanches occur on slopes between 30 and 45 degrees. This can be tricky to judge with an untrained eye, but a good rule of thumb is that if a slope is steep enough to be fun to ski, it’s steep enough to slide. Critically, you don’t have to be on the steep slope itself to be in danger. You can trigger a slide from below (remote triggering) or be caught in the run-out zone of a slide that starts far above you.
For any UK hiker looking to venture beyond marked trails in places like Scotland or the Lakes, an avalanche awareness course is essential. These courses, run by certified mountain guides or institutions like Glenmore Lodge, don’t just teach you how to use the gear; they teach you the far more important skill of how to read the terrain and the avalanche forecast to avoid needing the gear in the first place. Until you have taken such a course, your responsibility is to stay on marked trails or in areas with slope angles well below 30 degrees.
Microspikes vs Snowshoes: Which Winter Traction Device for Variable Snow Conditions?
As you build your winter kit, you’ll encounter another key piece of gear: microspikes. It’s a common point of confusion for beginners, but the distinction is simple and crucial. It comes down to two different principles: traction versus flotation. They are different tools for entirely different jobs, and often a winter hiker in the UK will carry both.
Microspikes are essentially chains with small spikes that you pull over your boots. Their sole purpose is to provide grip on hard, icy surfaces. Think of a popular mountain path like the Llanberis Path on Snowdon in winter; it gets compacted by hundreds of boots and turns to a sheet of ice. Here, microspikes are essential for traction to prevent a slip. However, they offer zero flotation. If you step off that icy path into two feet of soft powder, you will sink immediately.
Snowshoes, as we’ve discussed, are all about flotation. Their large surface area keeps you on top of deep, soft snow. They also have built-in crampons underfoot for traction, but their primary role is to stop you from sinking. Using them on a pure ice path would be clumsy and inefficient. Think of it like this: microspikes are like winter tyres for your car, essential for icy roads. Snowshoes are like a 4×4 with special wide tyres, designed to drive right over a muddy field. You wouldn’t use one for the other’s job.
Key Takeaways
- Flotation is the core principle of snowshoeing; it’s about staying on top of the snow to conserve energy, not plowing through it.
- Always choose snowshoe size based on your ‘Effective Load’—your body weight plus the full weight of your pack and winter clothing.
- Master your thermoregulation by starting cold and making constant micro-adjustments to your layers to prevent the dangerous sweat-then-chill cycle.
- Avalanche safety is about terrain choice. If a slope is steep enough to be fun to ski (30-45 degrees), it’s steep enough to slide. Get trained before you go.
Why Do Seemingly Gentle Snow Fields Cause 30% of Recreational Avalanche Deaths?
One of the most dangerous misconceptions in the mountains is that avalanche risk is confined to extreme, cliff-lined slopes. The hard reality is that looks can be deceiving. Research shows that approximately 30% of all avalanche fatalities occur during periods of ‘Moderate’ forecast danger, not ‘High’ or ‘Extreme’. This happens because people let their guard down in terrain that doesn’t look overtly threatening.
The first hidden danger is the weak layer within the snowpack. A beautiful, smooth field of powder can be sitting on top of a fragile, unstable layer of crystals deep within the snow. This is like a pane of glass resting on marbles. Your weight can be the final straw that causes the entire slab above the weak layer to fracture and slide, even on a slope that seems gentle. This underlying instability is completely invisible from the surface.
The second danger is the ‘terrain trap.’ A small slide on an open hillside might not be catastrophic, but if that same small slide funnels you into a gully, over a cliff, or into trees, the consequences are magnified enormously. A seemingly gentle snowfield might be located directly above a terrain trap. The danger isn’t just the slope you are on, but what is below it. This is why a core part of avalanche education is learning to see the landscape in terms of its consequences.
How to Cross Open Powder Fields Without Sinking or Triggering Avalanches?
The safest way to cross a potentially dangerous slope is to choose a route that avoids the danger in the first place. Your goal as a budding snowshoer isn’t to develop the skills to navigate high-risk terrain, but to develop the snowpack intelligence to identify and avoid it. As you stand at the edge of an open powder field, your first questions should be: « What’s the angle? » and « What’s below me? ».
Statistical data is brutally clear on this: over 80% of deadly avalanches happen in predictable terrain traps like bowls, gullies, and near ridge tops. The most prudent route-finding strategy is to actively avoid these features. Instead of cutting across the middle of a bowl, stick to the lower-angled ridges on the side. Instead of walking up the bottom of a gully, find a safer path on the shoulder above it. Always think about where the snow would go if it did slide, and make sure you are not in its path.
This image captures the allure of the winter landscape. The key to enjoying scenes like this for a lifetime is prudence. It’s about respecting the mountain and acknowledging what you don’t know. The joy of snowshoeing comes from the quiet solitude and the unique beauty of the winter world, and the foundation of that joy is a commitment to making safe decisions every time you step on the snow.
Your journey into winter landscapes starts with a single, well-informed step. The next logical move is to translate this knowledge into practice under the guidance of an expert. Consider booking a one-day introductory snowshoeing or winter skills course with a certified UK mountain guide to build a safe and solid foundation.