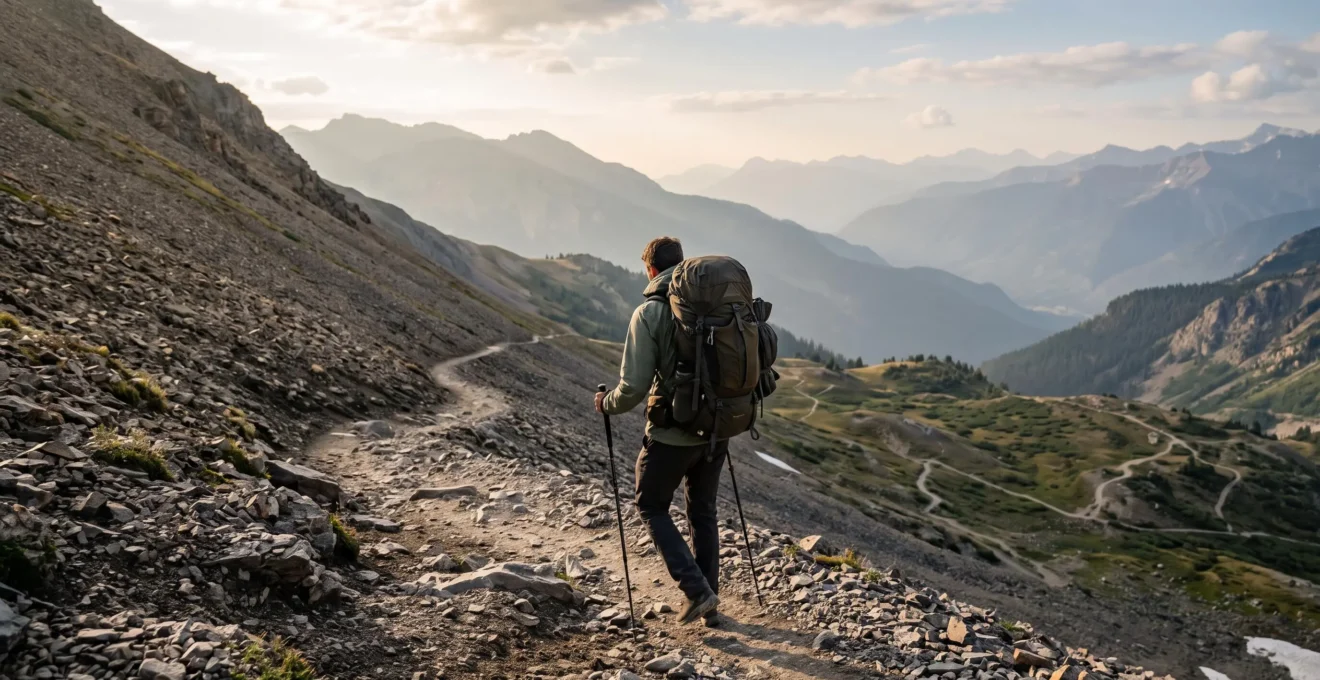
That burning in your thighs on steep ascents isn’t a sign you’re unfit; it’s a sign your training isn’t specific enough. Conquering major elevation gain requires more than just general cardio. This guide provides a focused physiological approach, teaching you to re-engineer your muscular recruitment patterns, build crucial eccentric strength for descents, and master energy efficiency techniques to turn you into a resilient mountain climber.
The feeling is all too familiar for many UK hikers. You feel aerobically fine, your breathing is under control, but halfway up a steep fell in the Lake District or a Scottish Munro, your quadriceps are screaming. It feels like your legs, not your lungs, are the limiting factor preventing you from enjoying the mountain and reaching the summit with energy to spare. Many assume the answer is simply more running or more generic gym work. They’re told to « do more squats » or « just get fitter, » but the frustrating quad burn persists on every steep incline.
This common advice misses the physiological reality of steep hiking. The challenge isn’t just about cardiovascular endurance; it’s about a highly specific type of muscular endurance, power distribution, and energy conservation. But what if the key wasn’t simply working harder, but training smarter? What if you could specifically target the weaknesses that big climbs expose and systematically rebuild your body to be an efficient climbing machine? That is the core principle of this guide. We will move beyond generic fitness advice and delve into the exercise science of vertical ascent.
This training plan will deconstruct the problem, from understanding the muscular mechanics at play to implementing sport-specific exercises and on-trail techniques. We’ll explore how to use gear to your advantage, prevent common injuries associated with fatigue, and structure your progression so you can confidently tackle not just 1,000-metre days, but even greater challenges in the future.
This comprehensive article breaks down the essential components of building elite hiking fitness. Below, the table of contents outlines the key physiological principles, training methodologies, and injury prevention strategies we will cover to prepare you for your biggest mountain days yet.
Contents: A Coach’s Guide to Mastering Mountain Ascents
- Why Do Your Quads Burn on Steep Ascents Even When Your Cardio Feels Fine?
- How to Use Trekking Poles to Reduce Knee Impact by 25% on Steep Downhills?
- Stair Training vs Hill Repeats: Which Method Builds Steep Hiking Endurance Faster?
- The Steep Ascent Mistake That Exhausts You 70% Faster Than Necessary
- When Can You Safely Attempt Routes with 1500m Elevation Gain After Mastering 1000m Climbs?
- The Mountain Hiking Mistake That Causes 50% of Ankle Injuries on Scree Slopes
- How to Descend Steep Trails at Speed Without Quad-Wrecking Braking Steps?
- How to Transition from Road Running to Trail Running Without Injury?
Why Do Your Quads Burn on Steep Ascents Even When Your Cardio Feels Fine?
The searing burn in your quadriceps during a steep climb, even when you aren’t out of breath, is a classic sign of a specific muscular imbalance known as quad dominance. In simple terms, your body is relying too heavily on the muscles at the front of your thighs (quadriceps) to do all the lifting, while under-utilizing the powerful muscles of your posterior chain: your glutes and hamstrings. When you step up, your brain sends a signal for muscles to fire. If your glutes are « lazy » or weak from a sedentary lifestyle, the quads take over the entire workload. This isn’t sustainable for the thousands of steps required on a big mountain day.
This inefficient movement pattern leads to rapid localised fatigue. Your quads become overwhelmed with metabolic by-products faster than your body can clear them, resulting in that burning sensation and a feeling of heavy, powerless legs. As exercise physiologist Dr. Romer noted for The Output by Peloton, « An athlete or individual displaying quad dominance is using a less than optimal muscle recruitment pattern ». This is not just a feeling; it’s a measurable physiological event. For instance, a controlled muscular endurance study found that the quadriceps show a fatigue index of 18%, indicating how quickly they tire under repeated stress compared to other muscle groups.
To solve this, your training must focus on two things: strengthening the posterior chain with exercises like deadlifts, kettlebell swings, and glute bridges, and consciously practicing glute activation during your hikes. Think about « pushing the hill away » with your entire foot and squeezing your glutes with each step. This redistributes the load across more powerful muscles, delaying quad fatigue and dramatically improving your climbing endurance. It transforms a quad-driven lunge into a full-body push, making you a far more efficient climber.
How to Use Trekking Poles to Reduce Knee Impact by 25% on Steep Downhills?
While ascents test your muscular power, descents punish your joints. The constant braking and absorption of impact, especially on steep or long downhills, places immense stress on the knees. Trekking poles are not a crutch for the unfit; they are a sophisticated tool for load management. By using your arms and core to share the burden of braking, you effectively transfer a significant portion of the force away from your legs. This is not just anecdotal; biomechanical research shows that trekking poles can reduce knee impact forces by up to 25%.
To get this benefit, technique is crucial. On descents, lengthen your poles so your elbows are at roughly a 90-degree angle when the pole tips are on the ground slightly in front of you. Plant the poles with each step, creating two additional points of contact. Instead of letting gravity slam your body down, you use the poles to control your descent, leaning into them and using your upper body to absorb the shock. This creates a smoother, more controlled movement and lessens the eccentric load on your quads—the muscle-lengthening contraction that acts as your body’s brakes and is a primary cause of next-day soreness (DOMS).
The protective effect of poles on joint health is well-documented, providing a clear illustration of how a simple tool can mitigate the stresses of high-volume hiking.
Case Study: The Protective Effect of Trekking Poles on Knee Cartilage
A study published in the Journal of Physical Therapy Science examined a group of subjects walking downhill on a treadmill set at a steep 15% decline. The researchers compared sessions where the subjects walked with and without a trekking pole. The findings were significant: the pole-assisted condition was associated with markedly reduced lower-limb joint stress. This supports the conclusion that using poles helps protect the knee joint and surrounding cartilage from damage during sustained downhill efforts, which is particularly crucial on long-distance hikes with significant elevation loss.
Essentially, poles turn a punishing, leg-only activity into a full-body effort. This not only saves your knees but also improves your balance on uneven terrain and reduces overall fatigue, allowing you to cover more ground safely and comfortably.
Stair Training vs Hill Repeats: Which Method Builds Steep Hiking Endurance Faster?
To prepare your body for steep ascents, you need to simulate that specific stress. The two most accessible and effective methods are stair training and hill repeats. While both involve climbing, they train your body in subtly different ways, and the optimal choice depends on your training goals and what phase of your plan you’re in. Neither is definitively « better »; they are different tools for different jobs. Hill repeats are the gold standard for sport-specific power and technical skill, forcing you to adapt to uneven terrain and developing both concentric (uphill) and eccentric (downhill) strength.
Stair training, on the other hand, offers a controlled, high-volume, low-impact environment. It’s perfect for base-building, allowing you to accumulate a huge amount of vertical gain without the pounding of running downhill or the technical risk of a slippery trail. You can precisely control the intensity and duration, making it a safe way to build foundational muscular endurance and cardiovascular fitness. Indeed, its benefits are well-studied; a 2005 study found that walking up and down stairs five days a week significantly improved VO2 max and other health markers in sedentary women, demonstrating its effectiveness as a fitness tool.
The following table, synthesized from expert training guidance, breaks down the key physiological and practical differences between these two powerful training methods.
| Criteria | Stair Training | Hill Repeats |
|---|---|---|
| Muscle contraction type | Primarily concentric (upward) | Concentric (up) and eccentric (down) |
| Impact level | Lower, forefoot-driven landing | Variable, depends on terrain and descent style |
| Accessibility | High (urban stairwells, gyms) | Requires access to outdoor hills/trails |
| Best training phase | Base-building (controlled volume) | Peak phase (sport-specific power and footing) |
| Technical skill development | Limited (uniform steps) | High (uneven, variable terrain) |
A balanced training plan should ideally incorporate both. Use stairs in the early phases to build a massive endurance base safely. As your target hike approaches, transition to hill repeats to develop the specific power, proprioception (your sense of body position), and technical footing required for real mountain terrain.
The Steep Ascent Mistake That Exhausts You 70% Faster Than Necessary
The single biggest mistake hikers make on long, steep climbs is trying to maintain a continuous, marching pace. This approach treats a 1,000-metre ascent like a walk in the park, leading to rapid heart rate spikes and premature muscular fatigue. The most critical skill for energy conservation is not about raw speed, but a technique used by seasoned mountaineers for decades: the rest step. As the experts at Blackbird Mountain Guides state, « the rest step is the most important skill you can employ to reduce energy output ». It’s a rhythmic, deliberate pace that integrates a micro-rest into every single step.
The core principle is to transfer your body weight onto a straight, locked leg, allowing your skeleton to take the load while the muscles of that leg momentarily relax. This brief pause prevents the build-up of lactic acid and keeps your heart rate from red-lining. It feels unnaturally slow at first, but over thousands of vertical metres, the energy savings are immense. It’s the difference between reaching the summit exhausted and arriving with reserves to spare. As one hiker on a forum noted, the « Rest Step can work wonders for tired, burning leg muscles if done properly ».
Mastering this technique is non-negotiable for anyone serious about tackling big elevation. Here is a step-by-step guide to performing it correctly:
- Step and Lock: Take a small step forward with one foot. As you transfer your weight onto this uphill foot, straighten that leg completely, locking the knee. Your downhill leg should now be relaxed.
- Pause and Rest: Hold this position for a brief moment (one or two seconds). In this locked-leg stance, your bones are supporting your weight, not your muscles. This is the « rest » in the rest step.
- Synchronize Breathing: Inhale during the pause. As you prepare for the next step, exhale. This creates a calming rhythm and ensures you remain in an aerobic state.
- Swing and Repeat: Swing your relaxed downhill leg forward to the next step position. Transfer your weight, lock the new uphill knee, and repeat the process. On extremely steep ground, you can use « pressure breathing »—exhaling forcefully through pursed lips—to aid oxygen exchange.
Practice this on a short, steep hill or even a staircase. The goal is to make the rhythm automatic, a smooth « step-lock-breathe, step-lock-breathe » cadence that you can maintain for hours.
When Can You Safely Attempt Routes with 1500m Elevation Gain After Mastering 1000m Climbs?
Successfully completing a 1,000-metre day is a huge milestone. It proves you have a solid foundation of fitness. However, jumping from a 1,000m climb to a 1,500m one is not a linear step. That extra 500 metres represents a 50% increase in vertical effort, which can mean several additional hours on the trail, dramatically increasing fatigue and the risk of injury. The transition requires a deliberate and structured increase in your training volume and intensity, a principle known as progressive overload. You don’t jump to the next level; you build a bridge to it.
Before considering a 1,500m day, you should be able to complete 1,000m ascents comfortably, finishing with energy in reserve and experiencing minimal soreness the next day. Your training should systematically prepare you for the increased demand. Key principles for this progression include:
- Regularity is Key: Start hiking consistently over varied terrain well before your target trip to teach your body the specific movements and stresses of trail travel.
- Train in Your Kit: Do your training hikes in the exact boots and with the weighted pack you plan to use. Your body needs to adapt to the specific load.
- Gradualism: Increase your longest weekly hike’s elevation and distance by no more than 10-15% per week to avoid over-training and injury. A sudden leap is a recipe for disaster.
- Listen to Your Body: Prioritize preparing the body without overloading it. Start slow and only increase the difficulty as your body positively responds. If you feel excessive fatigue or pain, take an extra rest day.
A readiness audit is the best way to objectively assess if you are prepared for the next level of challenge. Use the following checklist to evaluate your current state and identify areas for improvement before you commit to a bigger objective.
Action Plan: Your 1,500m+ Climb Readiness Audit
- Baseline Performance Review: Log your last three 1,000m+ hikes. Record total time, moving time, and your perceived effort (RPE on a 1-10 scale) for the final hour. An RPE below 7/10 indicates readiness.
- Strength & Stability Inventory: Can you perform 3 sets of 15 single-leg glute bridges and hold a single-leg balance for 30 seconds on each side? This checks for essential posterior chain strength and stability.
- Movement Pattern Check: Film yourself performing a bodyweight squat. Do your knees collapse inward or does your torso pitch excessively forward? These are signs of quad dominance and weak glutes that must be addressed.
- Recovery & Adaptation Analysis: After your longest weekly training session, how do you feel 24-48 hours later? If Delayed Onset Muscle Soreness (DOMS) is debilitating or lasts more than two days, your body has not yet adapted to the current workload.
- Targeted Progression Plan: Based on this audit, identify your primary weakness. For the next 4 weeks, commit to a specific goal: either increasing total weekly training elevation by 10%, adding one dedicated posterior chain strength session per week, or adding 10 minutes of targeted mobility work daily.
The Mountain Hiking Mistake That Causes 50% of Ankle Injuries on Scree Slopes
As you progress to longer, more challenging hikes with 1,500m+ of elevation, fatigue becomes a significant factor in injury risk. When you’re tired, your form breaks down, and your neuromuscular control diminishes. This is never more apparent than when crossing a treacherous scree slope late in the day. The most common mistake is failing to adjust technique for this unstable surface, leading to an over-reliance on the ankle joint for stability. This can easily result in a sprain, one of the most common hiking injuries. In fact, research indicates that more than 70%+ of trail-related ailments are overuse injuries, often exacerbated by fatigue and poor technique on difficult terrain.
On loose rock, the surface is constantly shifting. The mistake is to keep your ankle rigid, trying to force stability where there is none. This places immense torque on the ligaments. A rolled ankle on scree is not just bad luck; it’s often a failure of technique. The consequences are significant; as Trail Runner Magazine points out, « athletes who have an injury-weakened ankle joint are about 10 times as likely to suffer a repeat injury. »
To cross scree safely, you must change your mindset and movement. This image of a boot flexing over loose rock illustrates the dynamic interface between your foot and the unstable ground.
The correct technique involves keeping your ankles relaxed and flexible, letting them act as shock absorbers. You should also lower your centre of gravity by bending your knees, engage your core for balance, and use trekking poles for additional points of contact. Think of it as « skiing » down the scree with short, controlled sliding steps rather than fighting for purchase with each footfall. This distributes the stabilising work across your entire leg and core, taking the strain off your vulnerable ankle ligaments. Training for this involves exercises that improve proprioception and stability, such as balancing on one leg or using a wobble board.
Key takeaways
- Quad burn is a sign of specific muscular imbalance (quad dominance), not just general unfitness.
- Descending is physiologically demanding; trekking poles and eccentric strength training are essential to protect your knees and reduce soreness.
- True hiking fitness is built through a combination of sport-specific training (hill repeats), technique mastery (rest step), and targeted strength work (posterior chain).
How to Descend Steep Trails at Speed Without Quad-Wrecking Braking Steps?
The descent is often an afterthought for hikers focused on the summit, yet it is where the majority of accidents and injuries occur. A startling nine-year study by a researcher at the University of Innsbruck revealed that 75% of hiking accidents happened during the descent, largely due to fatigue and loss of control. The natural tendency when going downhill is to « brake » with each step, a jarring motion that sends shockwaves through your knees and hammers your quads. This is incredibly inefficient and the primary reason your quads feel destroyed after a long day in the mountains.
The key to descending gracefully and efficiently lies in building eccentric strength. This is the strength your muscles exhibit while lengthening under load—precisely what your quads, glutes, and hamstrings do to control your body’s momentum on a downhill. As the experts at Exerfly explain, « These muscles control the body’s downward momentum and help decelerate during downhill movements ». Without adequate eccentric strength, your muscles can’t effectively absorb the impact, passing that stress directly to your joints and leading to that « quad-wrecking » feeling.
To build this specific strength, you must incorporate eccentric-focused exercises into your training. This can be as simple as focusing on a slow, controlled lowering phase in your squats and lunges (e.g., three seconds down, one second up). Other highly effective exercises include box step-downs and weighted pack descents on a moderate, non-technical hill. The goal is to teach your muscles to act as smooth, effective brakes, absorbing energy rather than fighting against it. This not only saves your quads and knees but also allows you to descend with more confidence and speed.
How to Transition from Road Running to Trail Running Without Injury?
Many hikers and road runners look to trail running as a way to boost their cardiovascular fitness and enjoy more time in nature. However, transitioning from the predictable surface of pavement to the chaotic, uneven world of trails requires a significant adaptation in technique and physical preparedness. The mistake is assuming your road running fitness will transfer directly. As the image below shows, the moment your foot leaves the tarmac and hits the dirt, the rules of the game change entirely.
Trail running demands constant micro-adjustments for balance, a shorter, quicker stride to react to obstacles, and greater ankle and hip stability to prevent twists and falls. As one runner who made the switch noted, « I found myself naturally bending my knees to absorb the impact, » highlighting the shift from a powerful, driving stride on the road to a more reactive, absorbent one on the trail. Attempting to use a long, loping road-runner’s stride on a technical trail is a fast track to injury.
The physiological demands are also different. According to a paper from the University of Florida’s PM&R Department on trail running injuries, « Key mechanisms underlying injury include inadequate neuromotor control, running through fatigue, and abnormal kinematics ». This means injuries often happen not because of a single bad step, but because of a breakdown in the brain-body connection when fatigued. Your training, therefore, must include not only running but also balance, agility, and stability work (like single-leg RDLs or bosu ball exercises). Start slowly, reduce your mileage initially, and focus on form over speed. Walk the steep uphills and focus on controlled, nimble feet on the downhills. This careful transition will build the specific strength and neuromotor control needed to run on trails safely and enjoyably for years to come.
By integrating these principles—from correcting muscular imbalances to mastering on-trail techniques and building sport-specific strength—you can systematically transform your ability to handle massive elevation gain. The next step is to move from understanding to action. Begin today by incorporating one posterior chain exercise and practicing the rest step on your next walk, and you will be on your way to conquering your next 1,000-metre peak with confidence.