In summary:
- Your biggest barrier isn’t fitness; it’s the fear of getting lost. Overcome it by learning to trust the UK’s official waymarked trail system.
- Start with clearly marked National Trails, symbolised by an acorn (England/Wales) or a thistle (Scotland), to build navigation confidence.
- Choose your first trails based on terrain (sheltered woodland vs. exposed coast) and logistical simplicity, not just distance.
- Gradually increase your hike duration and complexity only after you’ve mastered pre-hike planning, especially preparing for rain.
- Begin with a well-serviced, low-anxiety route like a section of Hadrian’s Wall Path to experience a ‘classic’ hike safely.
The pull of the British countryside is strong. You see photos of stunning coastal cliffs and rolling green hills, and you think, « I want to do that. » But then a wave of doubt washes over you. What if I get lost? What if I choose a route that’s too hard? What if the weather turns? For many aspiring walkers, the fear of the unknown is a far greater obstacle than any steep hill. It’s a feeling I’ve seen countless times in my 15 years as a Mountain Leader. Many people believe the answer lies in buying expensive gear or downloading a dozen apps, hoping technology will solve the problem.
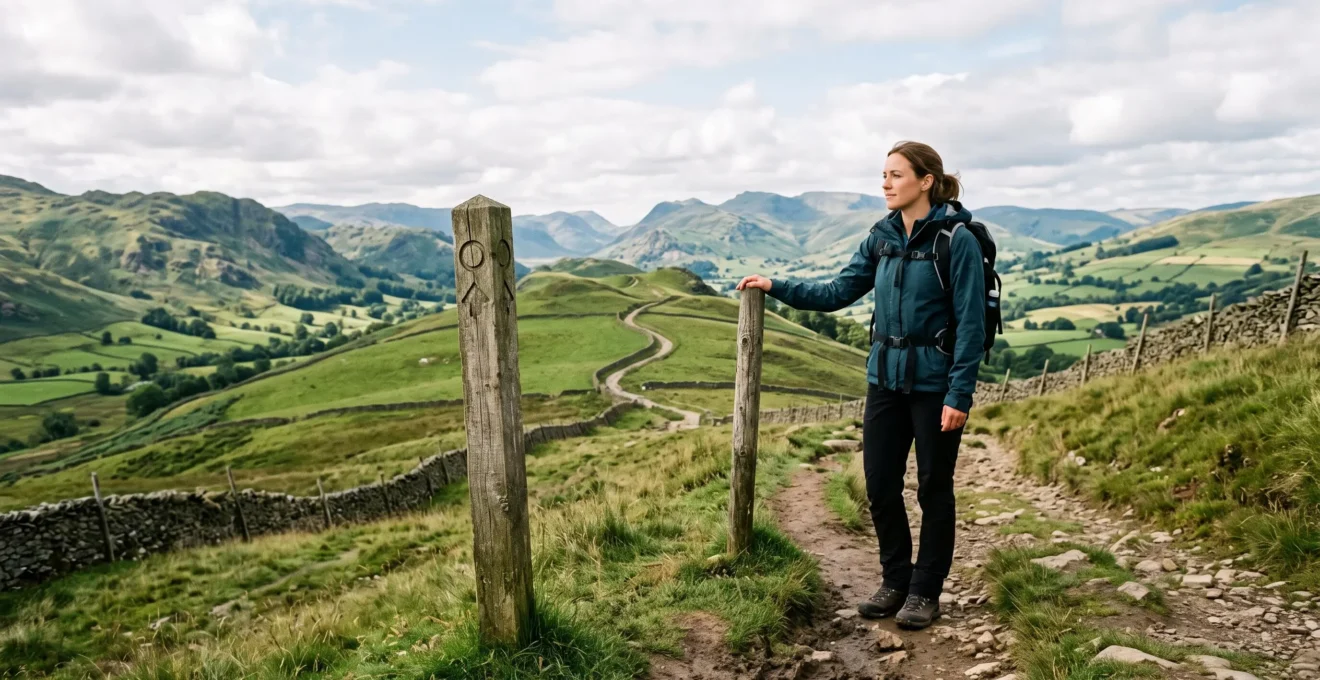
But what if the real key to confidence wasn’t in your backpack, but already out there on the trail, waiting for you? The secret to unlocking the UK’s greatest walks isn’t about conquering fear, but about sidestepping it altogether. It’s about developing ‘trail literacy’—learning to read the language of the path. The UK is crisscrossed by a network of official, quality-assured waymarked trails designed specifically to be navigated with confidence. By learning to trust this system, you transform a journey of anxiety into an adventure of discovery.
This guide is built on that single principle. We won’t just list a few routes; we’ll show you how to interpret the signs that build confidence, how to choose the right type of trail for your current level, and how to know exactly when you’re ready to progress from a short walk to a fulfilling day-long hike. It’s time to stop worrying and start walking.
To help you start your journey with confidence, this article breaks down everything a first-time walker needs to know. Explore the sections below to build your knowledge step by step.
Contents: Your Path to Confident Hiking
- Why Do Waymarked Trails Make Classic Hiking 70% Less Stressful for Beginners?
- How to Interpret Trail Blazes and Waymarkers on British Long-Distance Paths?
- Coastal Paths vs Woodland Trails: Which Classic Hiking Style Suits Your Fitness Level?
- The Classic Hiking Mistake That Leaves 60% of UK Walkers Underprepared for Rain
- When Should You Extend Your Classic Hikes from 2 Hours to 5 Hours?
- Why Do Waymarked Paths Reduce Navigation Anxiety by 85% for Solo Walkers?
- When Should You Shift from Casual Strolls to Planned Day Hiking Routes?
- Which UK Waymarked Paths Offer the Best Self-Guided Adventures for Solo Hikers?
Why Do Waymarked Trails Make Classic Hiking 70% Less Stressful for Beginners?
For a beginner, the single biggest source of stress is the fear of taking a wrong turn. A waymarked trail directly tackles this anxiety by providing a constant stream of reassurance. These routes aren’t just random paths; they are part of a curated, managed system designed for public enjoyment and safety. When you see a waymarker, you’re not just seeing a direction sign; you’re seeing a promise of quality. This is what I call System Trust. You are putting your faith in a network that is professionally maintained.
The UK’s network is vast and well-established. It’s a huge asset for any walker, comprising 15 designated National Trails in England and Wales, plus 4 Long Distance Routes in Scotland, all managed to a high standard. Choosing to walk on one of these paths means you are following a route that has been vetted for its scenery, surface, and signposting. This removes the guesswork and mental load of route-finding, allowing you to relax, enjoy the scenery, and focus on the physical act of walking. Each signpost becomes a small victory, a ‘confidence checkpoint’ that confirms you’re on the right track and builds momentum for the journey ahead.
In a nutshell, it is a symbol of quality and value.
– Sheila Talbot, Lead Advisor, National Trails, Natural England
This official endorsement means the trail is more than just a line on a map. It signifies that the route is well-maintained, clearly signposted, and offers a premier walking experience. For a beginner, starting here is the smartest choice you can make. It’s not a shortcut; it’s a foundation for a lifetime of confident hiking.
How to Interpret Trail Blazes and Waymarkers on British Long-Distance Paths?
Once you decide to trust the system, the next step is to learn its language. Developing ‘trail literacy’ means understanding what the different signs and symbols are telling you. In the UK, this is refreshingly straightforward. Unlike the varied ‘blazes’ (painted marks on trees) used in other parts of the world, our system predominantly relies on signposts, discs, and symbols. The most important skill is recognising the key markers for National Trails and public rights of way.
The colour of the arrow on a waymarker post tells you what kind of path you’re on. A yellow arrow signifies a public footpath, for walkers only. A blue arrow marks a public bridleway, which is also open to horse riders and cyclists. A red arrow indicates a ‘byway open to all traffic’. For your first hikes, you’ll mostly be following the yellow arrows. The most significant symbols, however, are the ones that denote the top-tier trails. The iconic acorn symbol is the official logo for the National Trails of England and Wales. Spotting this means you’re on one of the country’s premier, well-maintained long-distance paths. In Scotland, the equivalent is the thistle in a hexagon, marking Scotland’s Great Trails.
This table summarises the most common symbols you’ll encounter. Learning to recognise them at a glance is a core part of building your navigation confidence. It’s like learning the key phrases of a new language before you travel.
| Symbol | Meaning | Typically Found On |
|---|---|---|
| Acorn | Official National Trail | Long-distance trails in England & Wales |
| Thistle | Scottish Great Trail | Long-distance trails in Scotland |
| Yellow arrow | Public Footpath | Local rights of way, walkers only |
| Blue arrow | Bridleway | Shared paths for walkers, horse riders, cyclists |
| Stone cairn | Route confirmation | Upland and mountain terrain where posts are impractical |
In upland or mountain areas where posts are scarce, you’ll often find cairns—piles of stacked stones—used to confirm the route. These are built by generations of walkers and serve the same purpose: to tell you, « You are in the right place. »
Coastal Paths vs Woodland Trails: Which Classic Hiking Style Suits Your Fitness Level?
Now that you know how to follow a waymarked trail, you need to choose the right kind of trail for your first adventures. The two classic British landscapes are the coast and the woods, and they offer very different experiences, especially for beginners. Your choice should be based on an honest assessment of your fitness and what kind of environment you feel most comfortable in. A woodland trail is often more forgiving for a first-timer. The terrain is typically flatter, the paths are sheltered from wind and rain, and navigation can feel simpler as the route is often more contained.
Coastal paths, while beautiful, can be deceptively demanding. They are exposed to the elements, and what looks like a flat walk on a map often involves a series of short, steep climbs and descents as the path dips down to coves and back up to the clifftops. This constant undulation, often called ‘undulating terrain,’ can be far more tiring than a longer, flatter walk. For instance, the South West Coast Path, the longest of the UK’s National Trails at 630 miles, has a total ascent greater than climbing Mount Everest four times. While you’ll only be walking a tiny section, it gives you an idea of the physical demand.
My advice is to start with a well-marked woodland or forest park trail. Build your stamina and confidence in a more sheltered environment. Once you’re comfortable walking for a couple of hours on gentle terrain, you’ll be physically and mentally prepared for the breathtaking views and challenges of a coastal path.
The Classic Hiking Mistake That Leaves 60% of UK Walkers Underprepared for Rain
There’s an old saying among mountaineers: « There’s no such thing as bad weather, only unsuitable clothing. » In the UK, this is the golden rule of hiking. The single biggest mistake I see beginners make is underestimating the British rain. They head out with a « showerproof » fashion jacket, which quickly soaks through in a proper downpour, leading to them becoming cold, miserable, and potentially dangerously hypothermic. This isn’t just uncomfortable; it’s a primary reason people need rescuing. In fact, there has been a 24% rise in the number of mountain rescue call-outs across England and Wales since 2019, many related to walkers being ill-prepared for the conditions.
The key is to invest in a proper waterproof jacket, not just a water-resistant one. A truly waterproof jacket, often made with a membrane like Gore-Tex, has taped seams and will keep you dry even in sustained rain. As the image shows, water should bead up and roll off the fabric, not soak in. Paired with waterproof trousers, this forms your essential outer shell. This isn’t an area to cut corners. A good waterproof layer is your most important piece of safety equipment. It allows you to stay out longer, remain comfortable, and make safe decisions even when the weather turns.
The British Mountaineering Council and Mountain Rescue England and Wales offer a simple, powerful mantra: « be prepared, be informed, and don’t rely on your phone alone ». Being prepared starts with the right clothing. Always check the weather forecast before you leave, but always pack your waterproofs, even if the sky is blue. In the British hills, the weather can change in minutes.
When Should You Extend Your Classic Hikes from 2 Hours to 5 Hours?
The progression from a short, two-hour stroll to a longer, five-hour day hike is a significant milestone. It’s the point where you move from casual walking to what I’d call « proper hiking. » The key is not to rush it. Pushing yourself too far, too soon is a recipe for exhaustion, blisters, and a loss of confidence. The decision to extend your time on the trail should be based on confidence and comfort, not just ambition. As a fellow Mountain Leader, Kerry Crosfield, puts it, the approach must be one of gradual progression.
If all you are used to is a walk around the block on flat ground, then you aren’t going to manage a 20-mile hike over the peaks on your first attempt. Instead, build up gradually so your muscles get stronger.
– Kerry Crosfield, Mountain Leader, Saga Magazine
You’re ready to extend your hikes when a two-hour walk feels comfortable, leaving you pleasantly tired rather than exhausted. You should be able to finish feeling like you could have kept going. Another sign is when you’ve mastered your basic kit—your boots are broken in, your backpack feels comfortable, and you’ve successfully used your waterproofs in a shower. Before you commit to a longer, more remote five-hour route, there are some non-negotiable safety steps to take. This represents a crucial shift in mindset towards self-reliance.
Action Plan: Your Pre-Hike Safety Checklist
- Inform Someone: Always tell a reliable person your exact route, including start/end points and your estimated finish time. Agree on a time to check in by.
- Carry a Full Kit: For longer hikes, you must carry an emergency kit (whistle, foil blanket, first aid), extra food and water, and a head torch, even if you plan to finish in daylight.
- Master Your Navigation Backup: Ensure your smartphone is fully charged and you have an app like OS Maps with the route downloaded for offline use. This is your backup, not your primary navigation tool.
- Pack for the Unexpected: Take extra warm layers (like a fleece and a hat) regardless of the forecast. The temperature can drop significantly on higher ground or if you have to stop unexpectedly.
- Check Your Battery: A portable power bank is a lightweight, essential item for longer hikes to ensure your phone remains a viable safety tool.
Why Do Waymarked Paths Reduce Navigation Anxiety by 85% for Solo Walkers?
Hiking alone can be an incredibly rewarding experience, offering solitude and a deep connection with nature. However, for many, the prospect is overshadowed by a heightened fear of getting lost. What if something goes wrong and there’s no one to help? This is where waymarked trails are not just helpful, but truly transformative for the solo hiker. The constant visual confirmation of the route provides a psychological safety net that is hard to overstate. Each acorn or thistle symbol acts as a silent companion, reassuring you that you are exactly where you are supposed to be.
This feeling of security is a top priority for those who venture out alone. Studies show that as many as 40% of UK travellers prioritise safety items when packing solo, indicating a deep-seated need for reassurance. A waymarked path is the ultimate safety feature. It dramatically reduces the cognitive load of navigation, freeing up your mental energy to simply enjoy the experience. You can lift your head from the map or phone and take in the views, listen to the birdsong, and feel the ground beneath your feet. This is the essence of mindful walking, and it’s far easier to achieve when you’re not constantly second-guessing your direction.
Furthermore, National Trails are popular routes. Even when walking solo, you are rarely completely alone for long. The shared path creates a sense of unspoken community. A friendly nod from a passing walker is another form of confidence checkpoint, reinforcing that you are on a well-trodden and safe path. For anyone hesitant about taking their first solo steps into the countryside, a waymarked trail is the perfect environment to build that self-reliance.
When Should You Shift from Casual Strolls to Planned Day Hiking Routes?
There’s a distinct moment when a walk becomes a hike. It’s a mental shift from a spontaneous stroll in the local park to a planned excursion into the countryside. This transition is less about distance and more about preparation and respect for the environment. You’re ready to make this shift when you find yourself wanting more—more challenge, more scenery, and a greater sense of accomplishment than your local loop can provide. However, this desire must be matched with a new level of responsibility. The consequences of being unprepared become more serious as you venture further afield, a fact reflected in sobering statistics from mountain rescue teams.
For example, in one of the UK’s most popular hiking areas, recent figures showed that year-on-year mountain rescue call-outs were up by 5 per cent, with fatalities soaring by 100 per cent in the Lake District. This isn’t to scare you, but to underscore that proper planning is not optional. The shift to planned hiking is defined by adopting a pre-hike ritual. It’s a routine you go through every single time, turning professional-level preparation into a simple habit.
This new ritual involves three core habits:
- Checking the Weather Religiously: This isn’t just glancing at a phone app. It’s looking at a detailed mountain weather forecast (like the MWIS or Met Office mountain forecasts) to understand wind speed, temperature at elevation, and the precise timing of any rain. This dictates what you wear and pack.
- Packing Your Bag Intentionally: You move from carrying just a water bottle to packing a rucksack with the ‘ten essentials’, including navigation tools (map and compass), extra layers, food, and a first aid kit. Even if you don’t use them, you practice carrying the weight.
- Communicating Your Plan: The most critical habit. You always leave a detailed route plan with someone reliable. This is your single most important safety net.
Making this shift is empowering. It marks your graduation from a casual walker to a self-sufficient hiker, capable of planning and executing your own adventures safely.
Key Takeaways
- True hiking confidence comes from ‘trail literacy’—learning to read and trust the UK’s waymarked trail system.
- Start with official National Trails (marked with an acorn or thistle) as they guarantee a high standard of maintenance and signposting.
- Always carry proper waterproofs. Getting wet and cold is the most common and dangerous mistake beginners make in the UK.
Which UK Waymarked Paths Offer the Best Self-Guided Adventures for Solo Hikers?
Choosing your first ‘proper’ waymarked hike is an exciting moment. The ideal route for a beginner, especially a solo hiker, offers a perfect balance of stunning scenery, clear navigation, and what I call logistical simplicity. This means easy access, reliable public transport or parking, and amenities like cafes or pubs along the way. These features reduce the mental load of planning and provide crucial safety nets, allowing you to focus on the walk itself. Fortunately, several of the UK’s National Trails are perfectly suited for this ‘graduated exposure’ approach.
One of the best starting points in the UK is Hadrian’s Wall Path. It’s relatively flat for much of its length, exceptionally well-signposted with the acorn symbol, and steeped in incredible history. Its popularity also means you’re never too far from fellow walkers or a village. A perfect taster is a specific, low-anxiety section that delivers a big reward for minimal stress.
Case Study: Housesteads to Steel Rigg on Hadrian’s Wall Path
The Hadrian’s Wall Path is one of the UK’s officially waymarked and maintained National Trails, following the acorn symbol along its 84-mile route. A well-serviced short section such as Housesteads to Steel Rigg offers easy parking at either end, iconic wall-top views within a manageable distance, and nearby facilities, making it a low-logistical-anxiety introduction to solo hiking on a nationally recognised path. This section contains the famous Sycamore Gap and offers some of the most dramatic landscapes of the entire trail in a bite-sized, confident-boosting day out.
As you build confidence, you can look to other trails that offer slightly more challenge. The following table gives a rough guide to how different popular trails compare, helping you choose your next step.
| Trail | Total Length | Terrain Type |
|---|---|---|
| Hadrian’s Wall Path | 84 miles | Rolling hills, Roman history, well-serviced |
| West Highland Way | 96 miles | Highland glens, more remote sections |
| South West Coast Path | 630 miles | Coastal cliffs, short steep ups-and-downs |
The first step is always the hardest, but by choosing a well-marked trail, you are setting yourself up for success. Start with a short section, learn the language of the path, and build from there. Your confidence will grow with every acorn symbol you pass, opening up a lifetime of adventure in the British countryside.